
How to Tie a Windsor Knot
The Windsor knot is a classic, symmetrical, and wide necktie knot perfect for formal occasions or professional settings. This guide will walk you through the precise movements needed to achieve a perfectly balanced triangle shape.

Drape the tie around your neck
30 secondsPlace the necktie around your collar with the wide end on your right and the narrow end on your left.
Ensure the wide end hangs approximately 12 inches lower than the narrow end. Adjust the length based on your height and the thickness of the fabric.
Make sure your shirt collar is popped up before starting.

Cross the wide end over
30 secondsCross the wide end over the narrow end to create an 'X' shape just below your chin.
Hold the intersection point firmly with your fingers to keep the tension consistent throughout the tying process.

Loop through the neck opening
45 secondsBring the wide end up through the loop between your neck and the tie, then pull it down behind the narrow end.
This step creates the first side of the triangular base of the Windsor knot.
Keep the knot snug against your neck to maintain shape.
Cross behind and loop again
45 secondsBring the wide end behind the narrow end, then pull it up and over the neck loop on the opposite side.
This creates the second side of the triangle, ensuring the knot will be symmetrical.
Ensure the fabric remains flat and does not twist while looping.

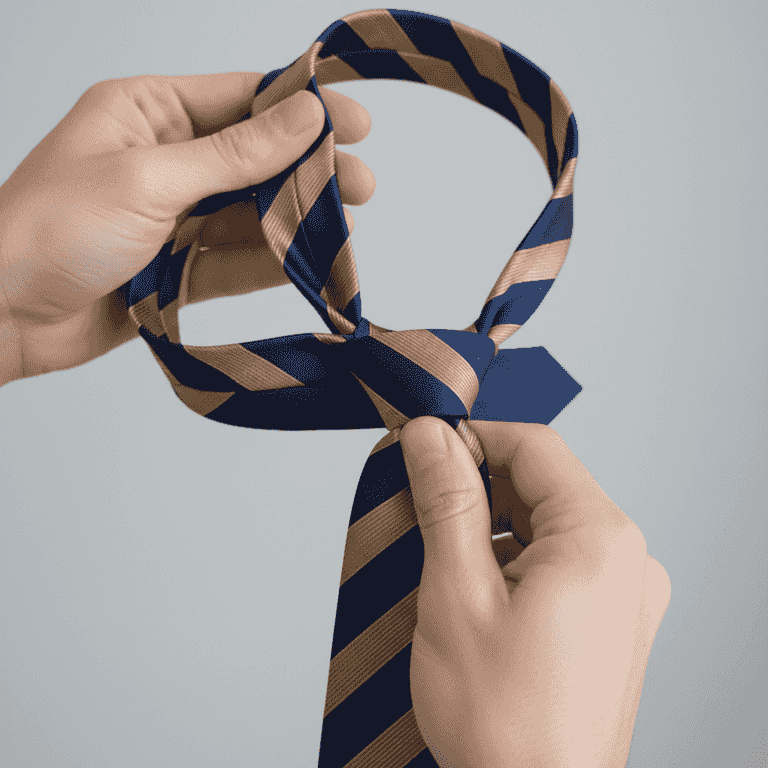
Form the front of the knot
30 secondsBring the wide end across the front of the knot from right to left.
This creates the horizontal band that will eventually hold the knot together and provide the signature Windsor width.
Keep the horizontal band flat and smooth.

Finish the knot
45 secondsPull the wide end up through the neck loop from underneath and feed it down through the front loop you created in the previous step.
Carefully guide the tip of the wide end through the horizontal band to lock the knot in place.
Use your fingers to widen the front loop before pushing the tip through.

Adjust and tighten
1 minutePull down on the wide end to tighten the knot and slide it up toward your collar while holding the narrow end.
Adjust the knot's position until it is centered and sits snugly against your collar points.
Create a small dimple in the fabric just below the knot for a professional look.
Pro Tips
- ●Always check the symmetry of the knot in a mirror before heading out.
- ●A Windsor knot is quite large; ensure your shirt collar is spread wide enough to accommodate it.
- ●If the knot is too small, your starting point for the wide end was likely too high.
- ●Practice the movements slowly to build muscle memory before trying to tie it in a hurry.