How to Sharpen a Kitchen Knife with a Whetstone
Restore your kitchen knife to a professional razor-sharp edge using a traditional whetstone. This guide walks you through the proper angle and technique to achieve a clean, efficient cut safely.
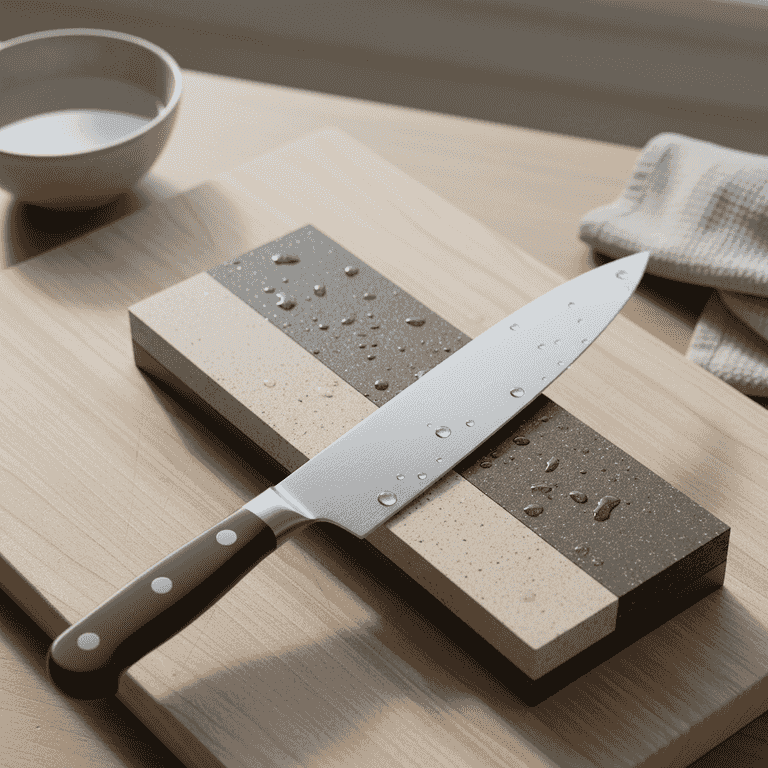
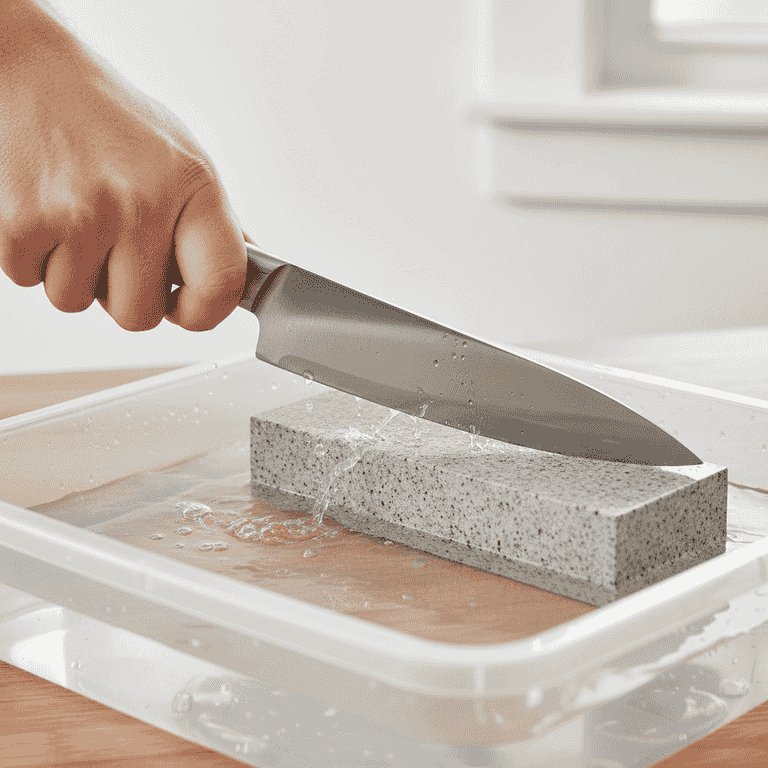
Prepare the whetstone
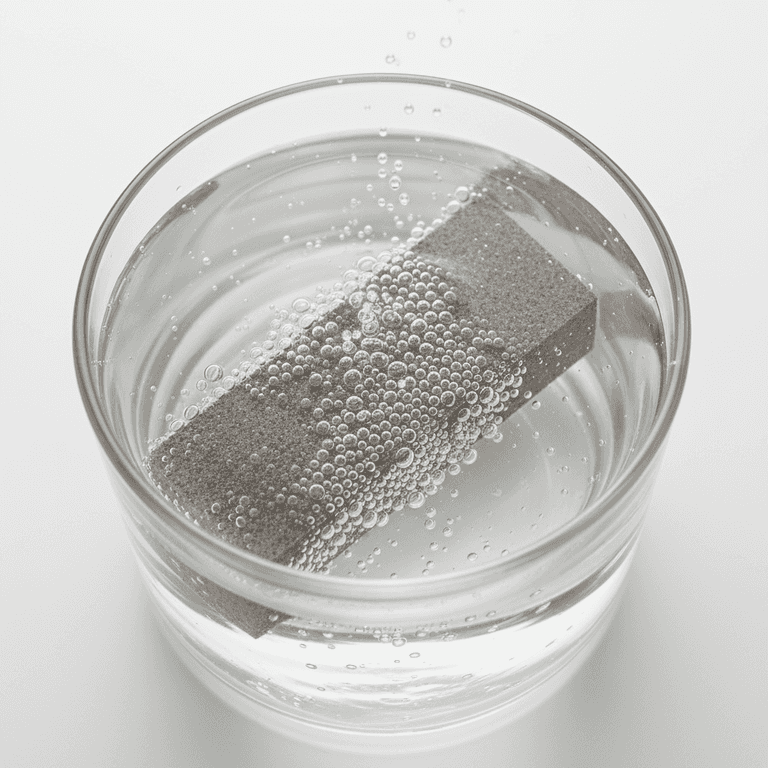
15 minutesSubmerge your whetstone in a bowl of water for 10 to 15 minutes until bubbles stop appearing.
Soaking ensures the stone is properly lubricated, which prevents the metal shavings from clogging the pores of the stone and keeps the blade cool.
If using a splash-and-go stone, simply spray the surface with water instead of soaking.
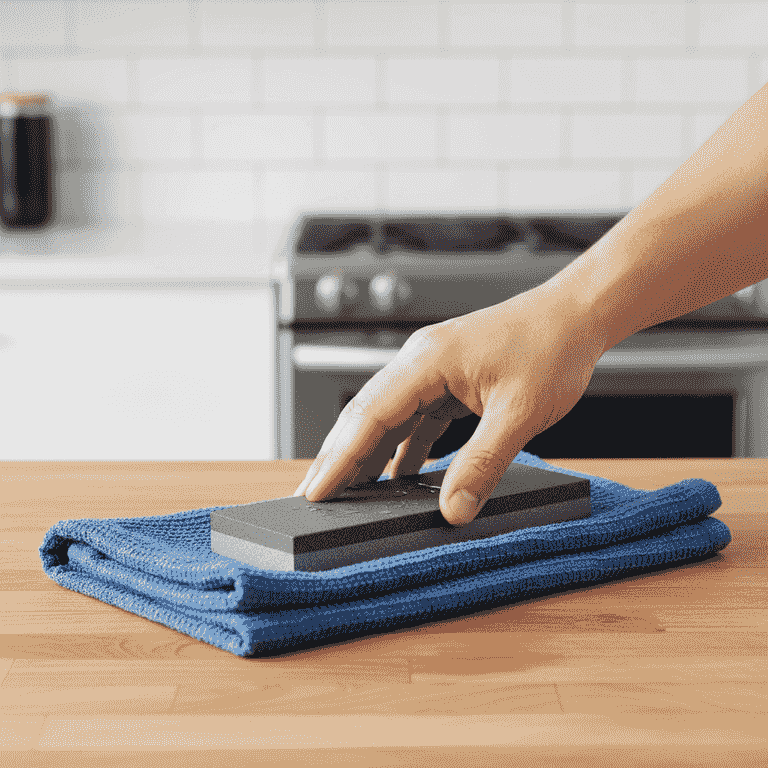
Stabilize the stone
1 minutePlace the damp towel on your countertop and set the whetstone on top of it.
The towel acts as a non-slip base, ensuring the stone does not slide while you apply pressure to the blade.
Ensure the coarse side of the stone is facing up for the initial sharpening phase.
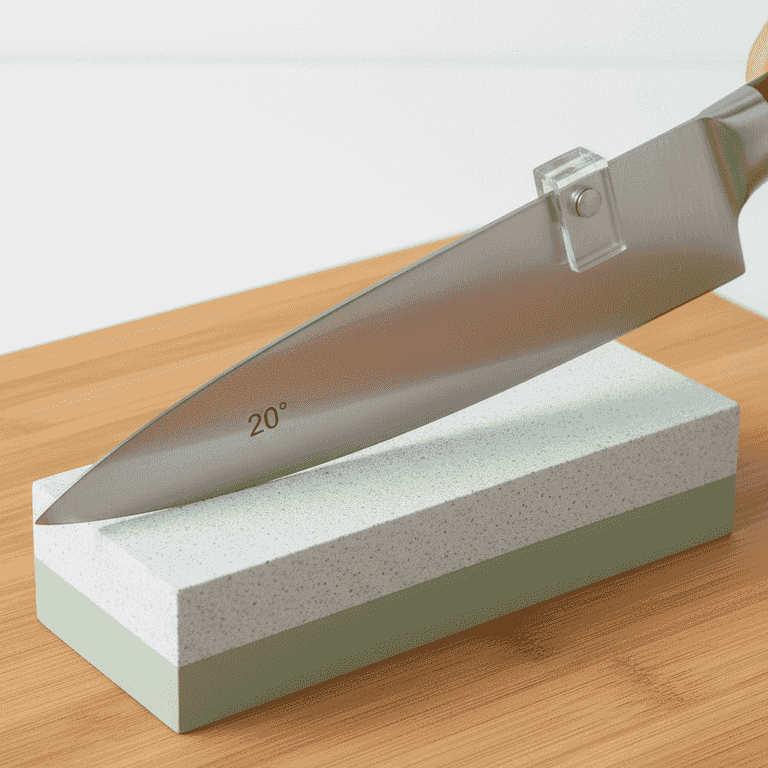
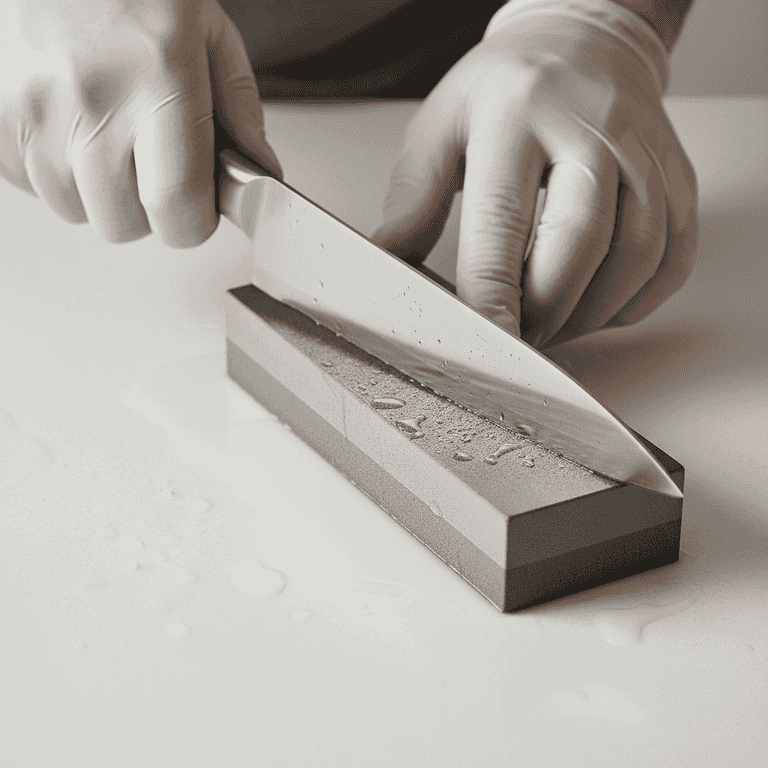
Set the angle
2 minutesHold the knife handle firmly and place the blade against the stone at a 15 to 20-degree angle.
A consistent angle is the most critical factor in achieving a sharp edge. You can use a small wedge or coin stack to visualize this angle if you are a beginner.
Do not let the angle vary, or you will create a rounded, dull edge.
Imagine the angle is roughly the width of two stacked quarters between the spine of the knife and the stone.
Sharpen the blade
5 minutesApply light pressure and pull the knife across the stone in a sweeping motion from heel to tip.
Maintain the angle throughout the entire stroke. Repeat this motion 10 to 15 times on one side until you feel a slight 'burr' or wire edge on the opposite side of the blade.
Keep fingers tucked away from the edge of the blade.
Listen for a consistent scratching sound, which indicates proper contact with the stone.
Flip and repeat
5 minutesTurn the knife over and repeat the same number of strokes on the other side of the blade.
This balances the edge and removes the burr created during the first stage of sharpening.
Use extreme caution when checking for the burr; do not run your finger along the sharp edge.
Check for the burr by carefully feeling the edge with your thumb, moving away from the blade edge.
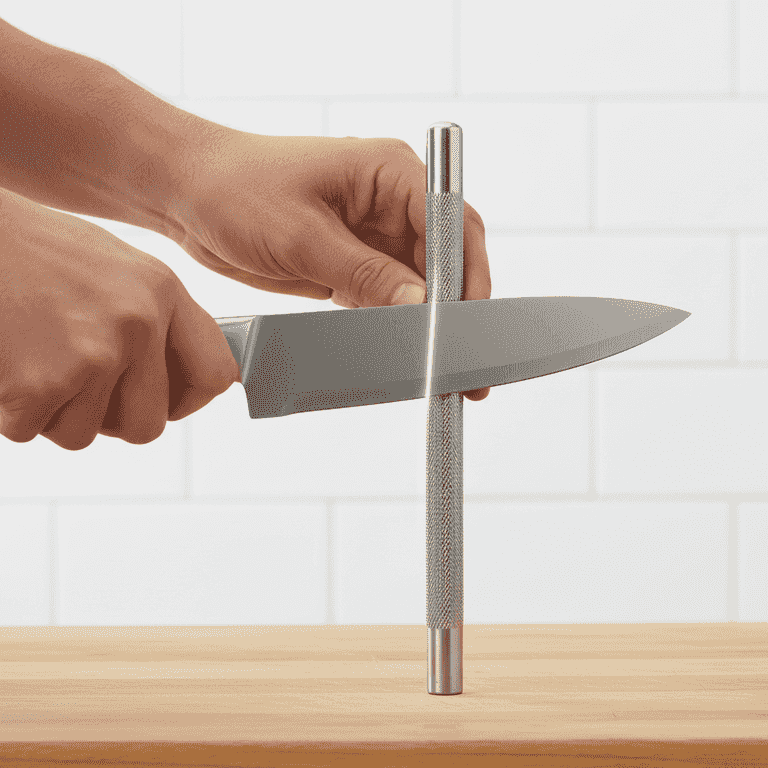
Hone the edge
2 minutesUse a honing steel to realign the edge of the knife.
Sharpening removes metal to create a new edge, while honing straightens that edge. This final step ensures the knife cuts smoothly through food.
Hold the steel vertically and draw the knife down at the same 20-degree angle, five times on each side.
Pro Tips
- ●Always keep the stone wet throughout the process to prevent overheating the metal.
- ●Clean your knife thoroughly after sharpening to remove any microscopic metal filings.
- ●Test your sharpness by slicing through a piece of paper; it should cut cleanly without tearing.
- ●Store your knives in a block or on a magnetic strip to keep the edges from dulling against other tools.