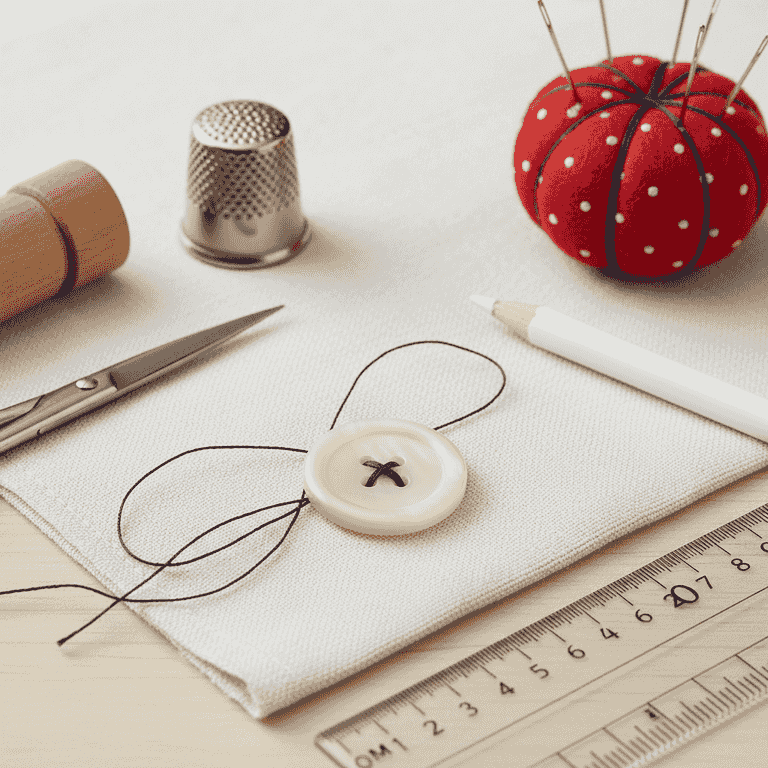
How to Sew a Button
Learn the essential skill of reattaching a loose button to your favorite garment. This guide walks you through the threading, knotting, and stitching process to ensure a secure and professional finish.
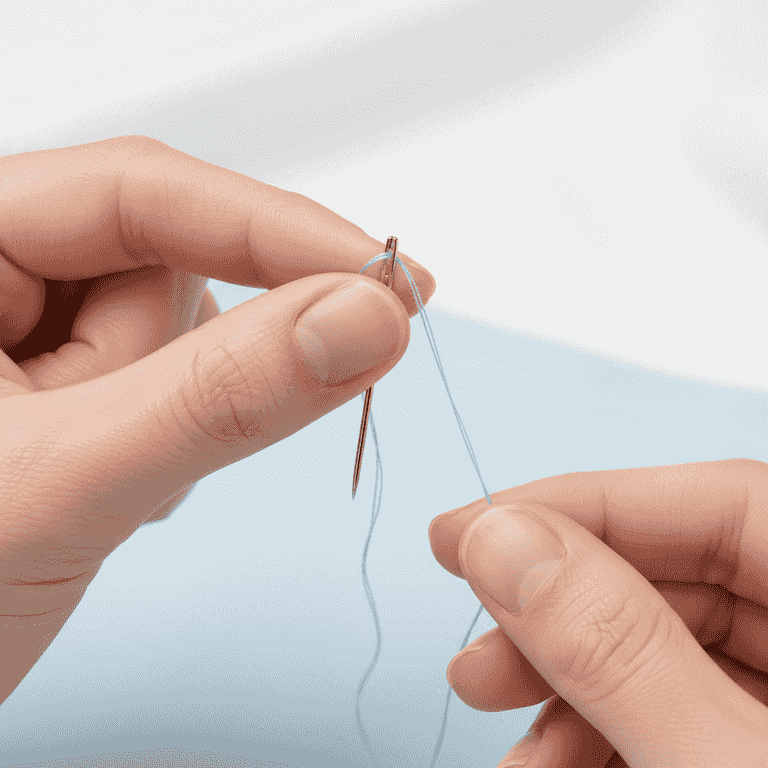
Prepare the needle and thread
2 minutesCut a piece of thread about 20 inches long and thread it through the eye of the needle.
Pull the thread ends together so they are even, then tie a secure knot at the very end to prevent it from pulling through the fabric.
Ensure the knot is large enough that it will not slip through the weave of the fabric.
If the thread is too long, it will tangle easily while you sew.
Mark the button position
1 minutePlace the button exactly where it needs to go on the fabric.
If you are replacing a lost button, look for the small pinprick holes left by the previous stitching to ensure it is perfectly aligned.
Anchor the thread
2 minutesPush the needle up through the fabric from the back side to the front at the exact spot where the button will sit.
Make a tiny stitch to secure the thread in place before you begin attaching the button itself, ensuring the knot remains hidden on the back.
Start your stitches inside the area where the button will cover them.
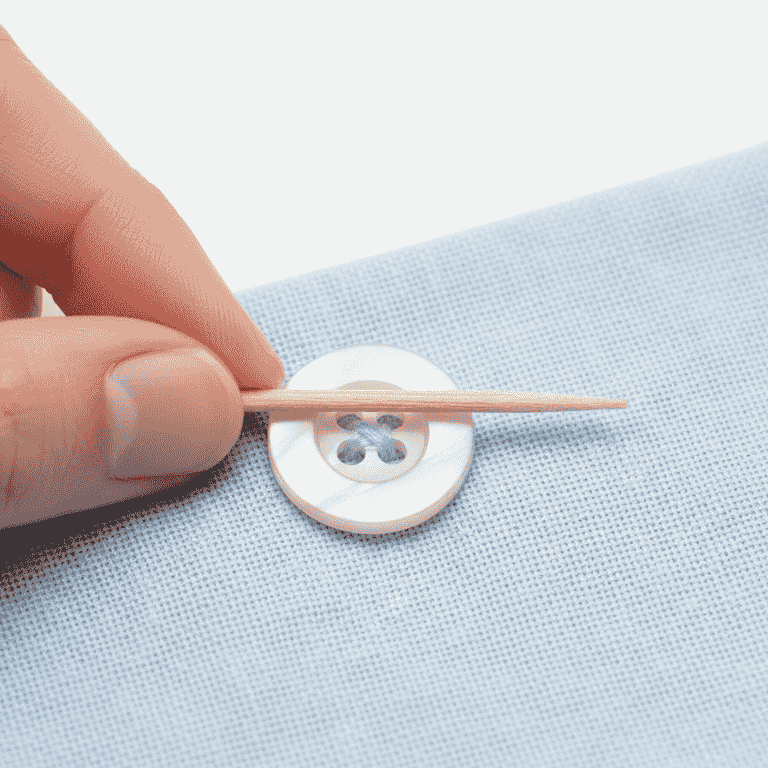
Position the button and spacer
1 minuteThread the needle through one hole of the button and place a toothpick horizontally across the top of the button.
The toothpick acts as a spacer, ensuring there is enough slack in the thread for the fabric to sit comfortably when the button is fastened.
If you don't have a toothpick, a matchstick or thick needle also works well.
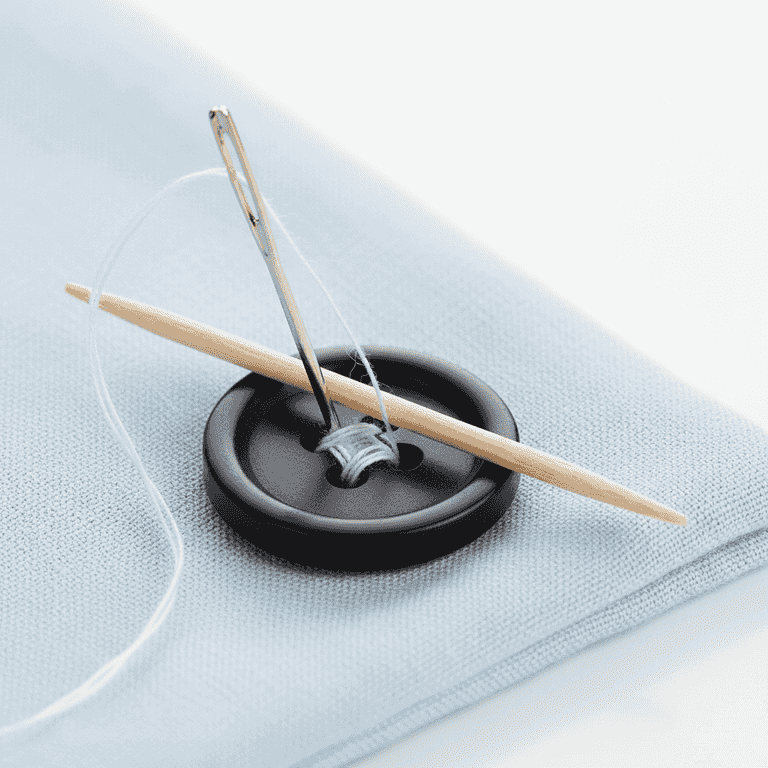
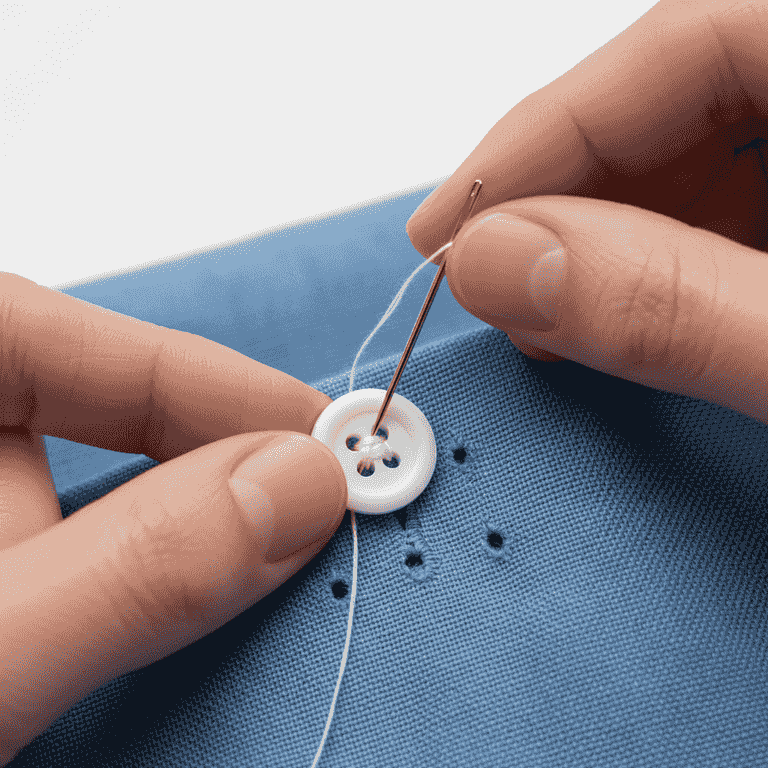
Sew the button
5 minutesBring the needle down through the opposite hole and back up through the fabric and the first hole again.
Repeat this process several times, ensuring your needle passes over the toothpick each time to maintain the thread slack.
Avoid pulling the thread too tight, or the button will be impossible to use.
Keep your stitches consistent so the button does not sit crooked.
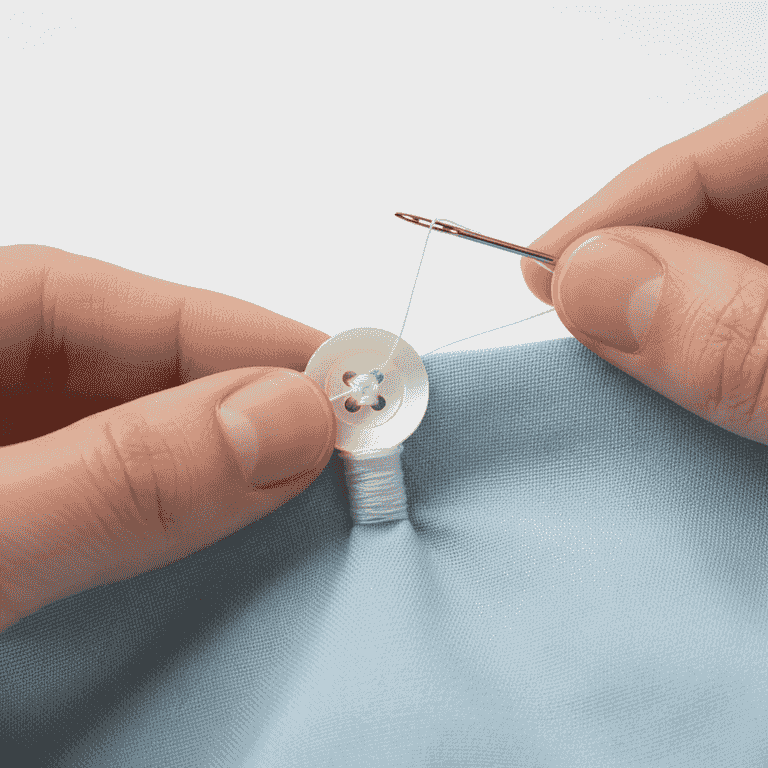
Create the shank and knot
3 minutesRemove the toothpick and wrap the thread tightly around the stitches between the button and the fabric several times.
This creates a sturdy 'shank' that protects the thread and makes the button easier to use. Secure the end with a small knot on the underside of the fabric.
Make sure the final knot is tight against the fabric to prevent the button from becoming loose again.
Use a dab of clear nail polish on the final knot to keep it from ever coming undone.
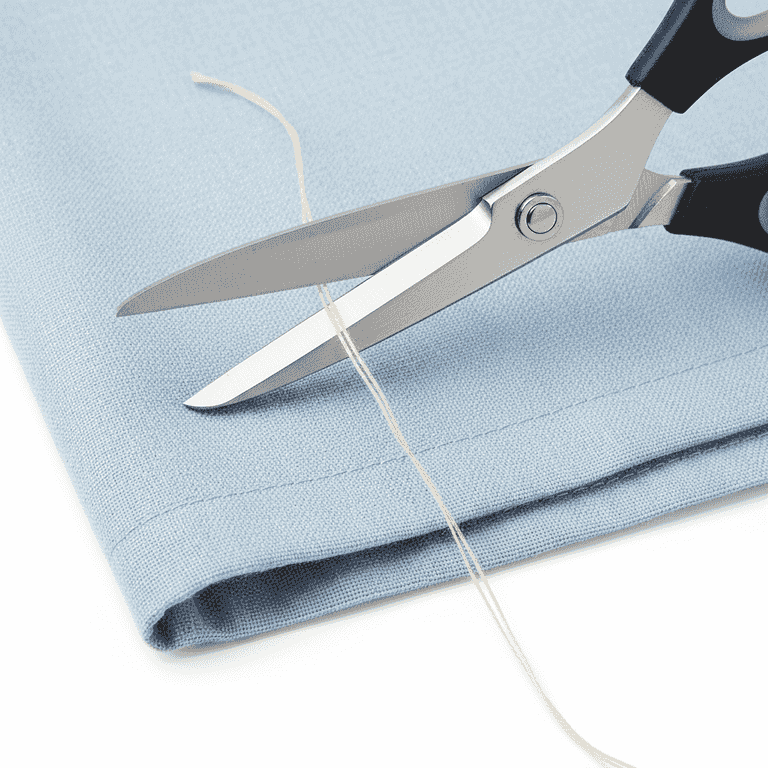
Trim the excess
1 minuteUse your scissors to carefully trim the remaining thread close to the knot.
Ensure you do not accidentally cut the fabric of your garment while trimming the thread.
Use sharp scissors to avoid fraying the thread ends.
Pro Tips
- ●Use a double strand of thread for extra strength if the garment is heavy-duty like a coat.
- ●Always use thread that matches the garment color, or clear monofilament thread if the button is multi-colored.
- ●If sewing a four-hole button, you can choose to sew them in a parallel or 'X' pattern depending on the desired look.
- ●Practice on a scrap piece of fabric if you are nervous about sewing directly onto a finished garment.