How to Patch a Drywall Hole
Restore your walls to a smooth finish by learning how to patch small to medium-sized drywall holes. This guide provides a professional approach to creating invisible repairs using basic patching materials.

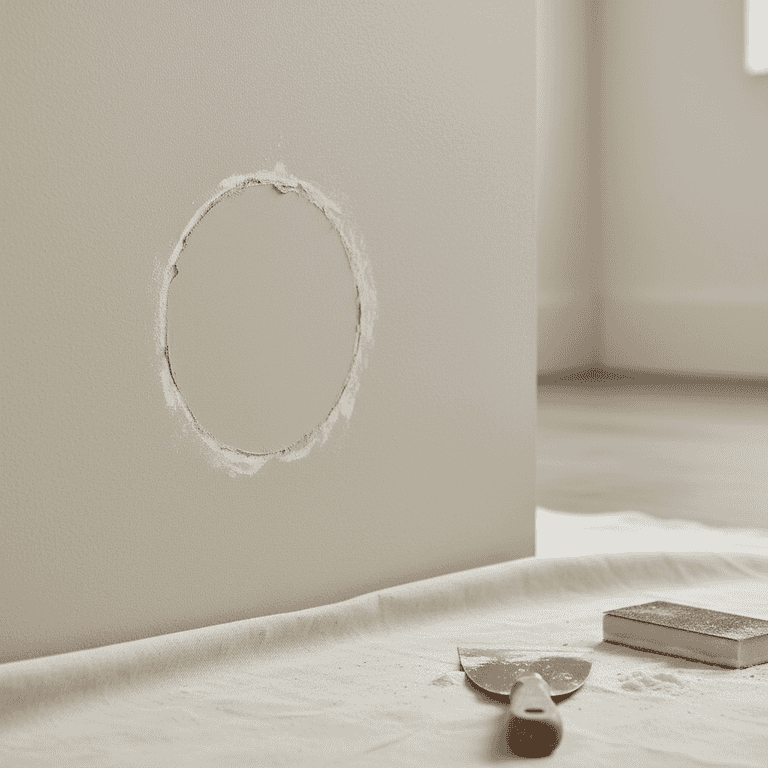
Clean the damaged area
5 minutesTrim away loose paper or drywall debris around the edges of the hole using a utility knife.
Removing loose material ensures the patch adheres to solid drywall. A clean, flat surface is essential for a seamless finish.
Be careful not to cut into electrical wires or pipes hidden behind the wall.
Cut at a slight inward angle to create a bevel that holds the compound better.
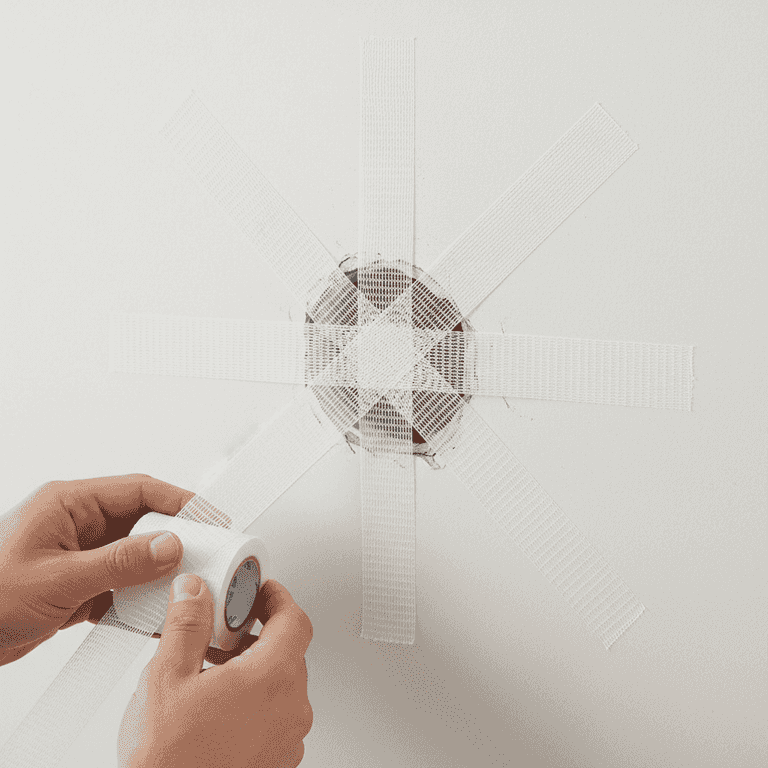
Apply mesh tape
3 minutesPlace self-adhesive mesh tape over the hole, overlapping the edges by at least an inch.
The mesh acts as a bridge for the compound, preventing it from falling into the wall cavity and providing structural integrity.
Ensure the tape is pressed firmly against the wall so it lays flat.
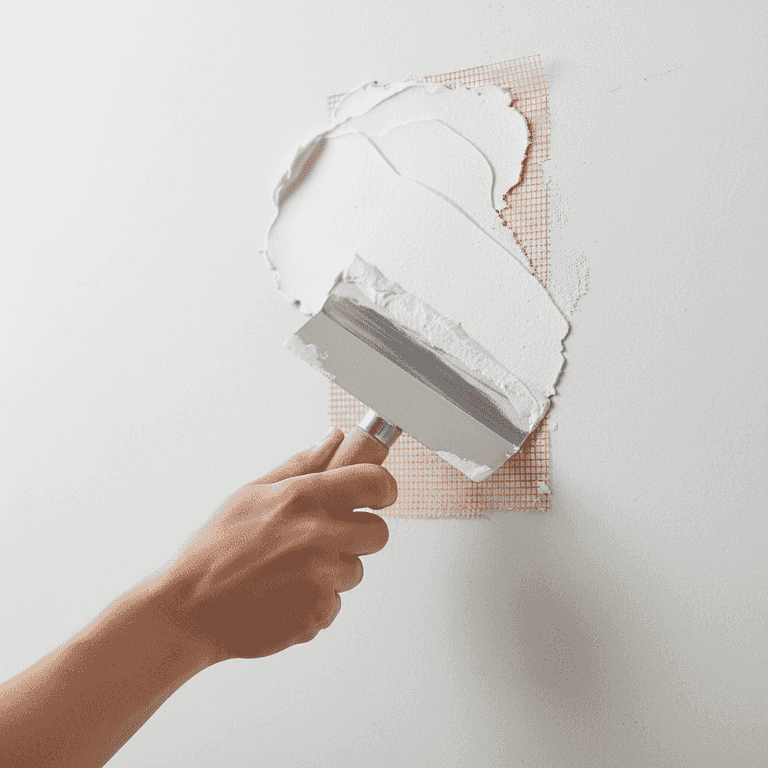
Apply the first coat of compound
10 minutesSpread a thin layer of drywall compound over the mesh tape using a putty knife.
Use firm pressure to push the compound through the mesh. Aim to keep the layer thin and feathered out toward the edges.
Do not try to fill the hole completely in one go; thin coats dry faster and crack less.

Let the compound dry
1 hourAllow the first coat to dry completely according to the product instructions.
The compound will change color from a dark grey or wet white to a uniform light white when it is fully dry.
Do not attempt to sand or apply a second coat while the compound is still damp.
Use a fan to speed up the drying process if the room is humid.
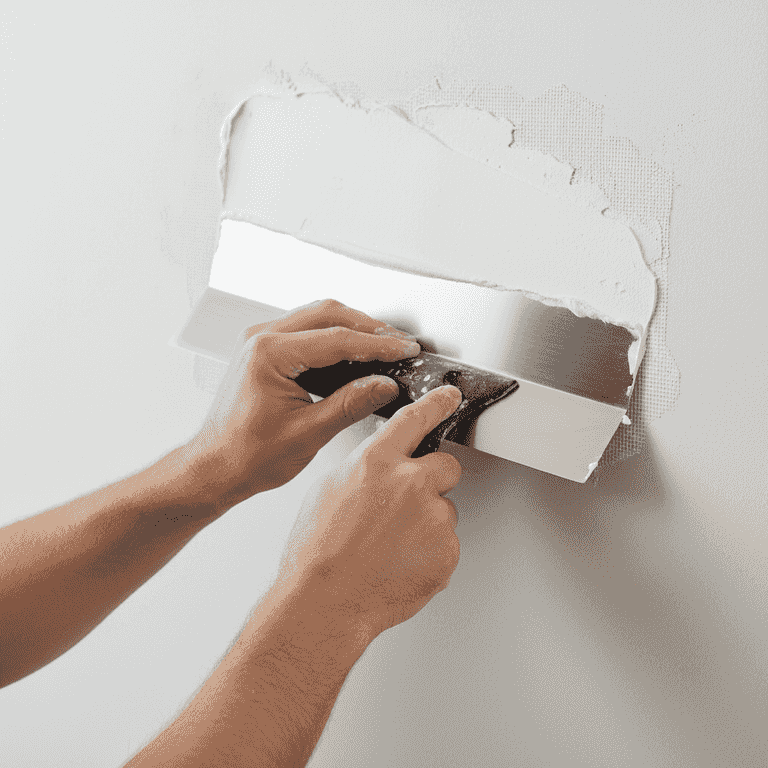
Apply a second coat
10 minutesApply a second, wider coat of compound to feather the edges into the existing wall.
Feathering means gradually thinning the compound toward the edges so the patch blends seamlessly into the surrounding wall surface.
Use a wider putty knife for the second coat to create a smoother transition.
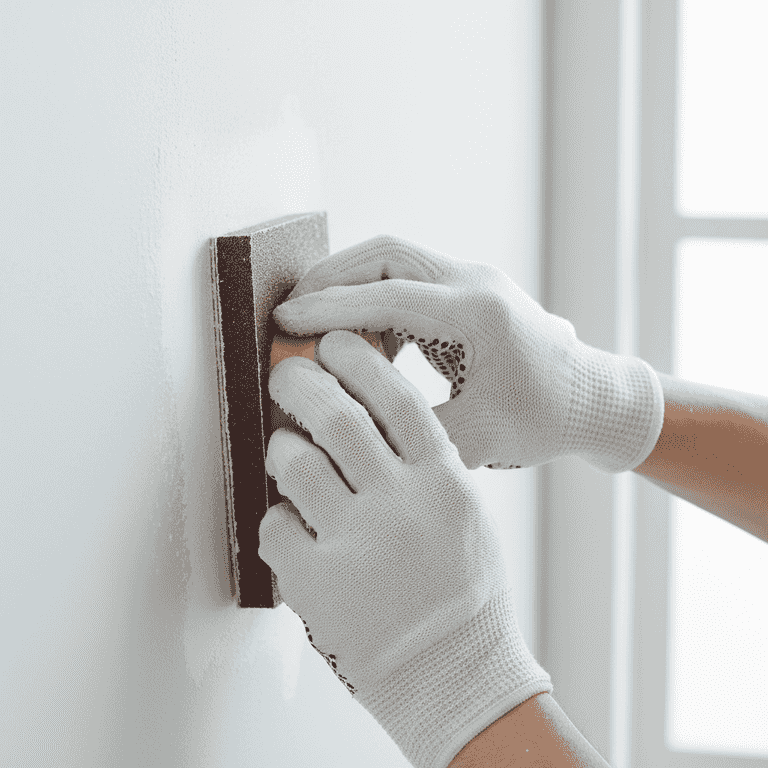
Sand the surface
10 minutesGently sand the dried compound with a sanding block until it is flush with the wall.
Use light pressure and circular motions to smooth out any ridges. Run your hand over the area to check for bumps.
Always wear your dust mask while sanding to avoid breathing in fine particulates.
Wipe the wall with a damp cloth after sanding to remove all dust before painting.
Pro Tips
- ●Always prime the patched area before painting to prevent 'flashing' or dull spots.
- ●If the hole is larger than 4 inches, use a metal backing patch or a wood support strip instead of just mesh tape.
- ●Store your drywall compound in an airtight container to keep it from drying out between projects.
- ●Use a bright flashlight held at an angle to the wall to reveal imperfections before painting.