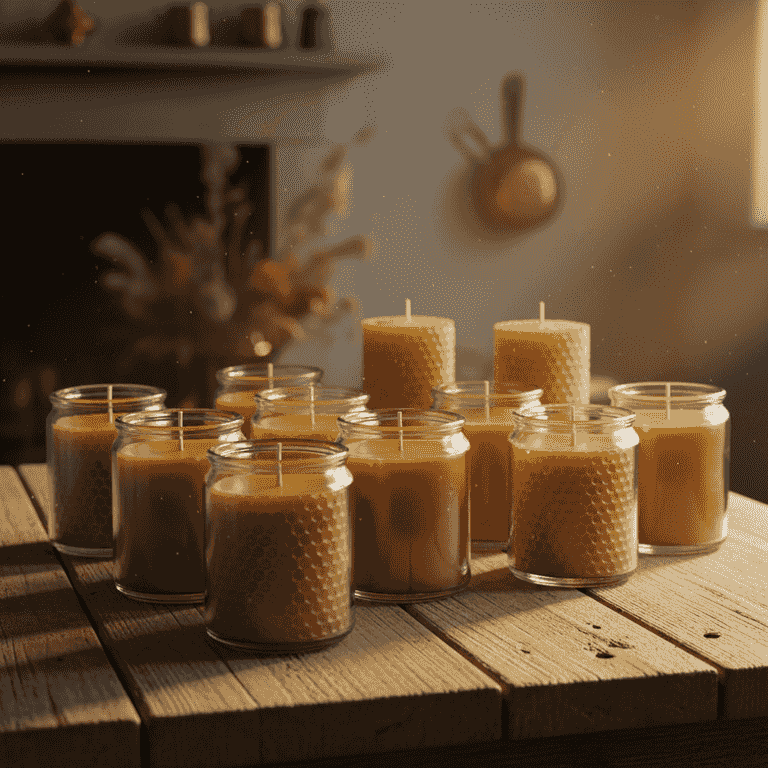
How to Make Natural Beeswax Candles
Create beautiful, eco-friendly candles using pure beeswax and cotton wicks. This guide walks you through the melting and pouring process to ensure a clean, long-burning candle.
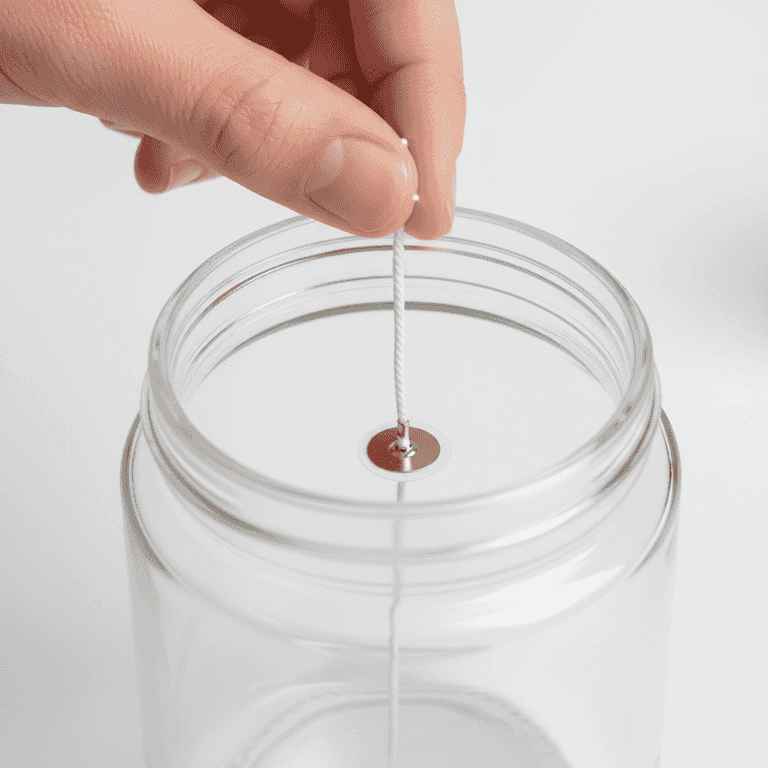
Prepare the wick
5 minutesSecure the wick to the center of the jar base using a wick sticker or a drop of hot wax.
Ensuring the wick is perfectly centered prevents the glass from overheating on one side. Hold the wick upright using a centering tool or a clothespin resting across the jar rim.
Dip the wick in melted wax and let it harden straight before placing it in the jar for better rigidity.
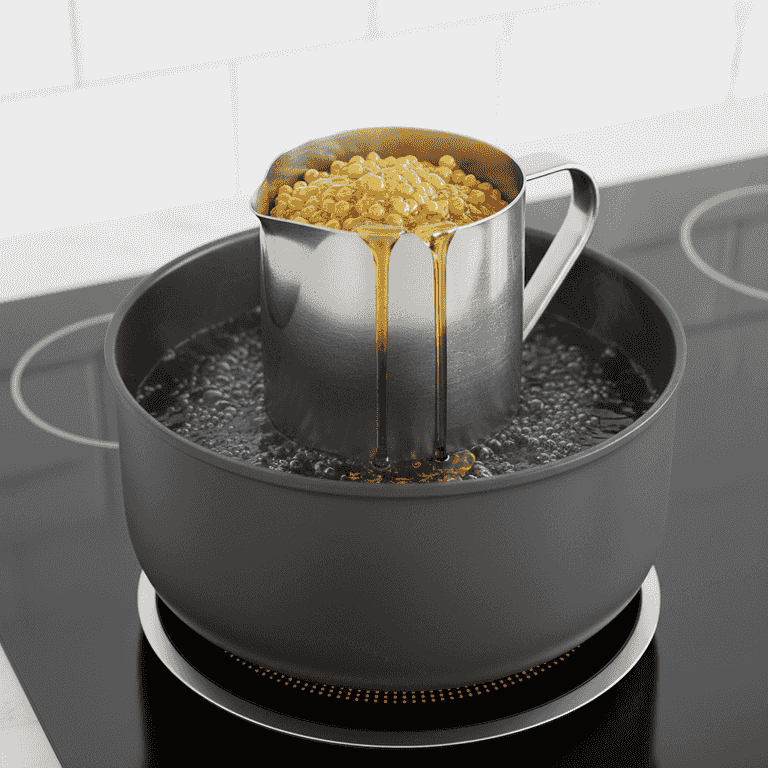
Melt the beeswax
20 minutesPlace beeswax pellets or blocks into the pouring pitcher and set it inside a pot of simmering water.
The double boiler method prevents direct heat from scorching the wax. Use medium-low heat to melt the wax slowly and evenly.
Never melt wax directly on an open flame or burner.
Break large beeswax blocks into smaller pieces to speed up the melting process.
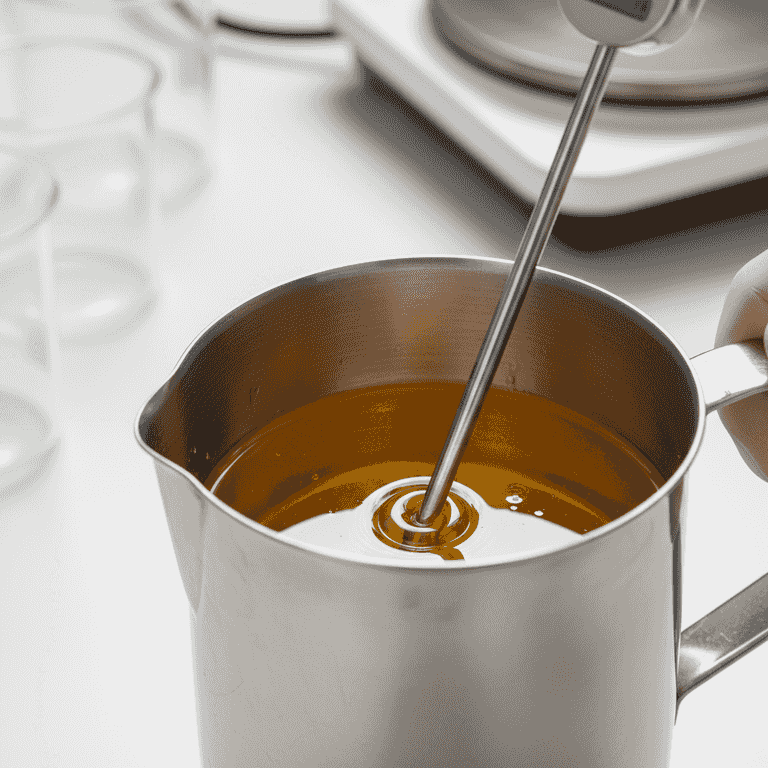
Monitor the temperature
5 minutesUse the thermometer to check that the wax reaches approximately 160°F (71°C).
Heating to this temperature ensures the wax is fully liquefied and ready for pouring without overheating. Remove the pitcher from the heat source once the target temperature is reached.
Do not let the wax exceed 185°F as it may discolor or become a fire hazard.
Wipe the thermometer probe clean immediately after checking the temperature to prevent wax buildup.
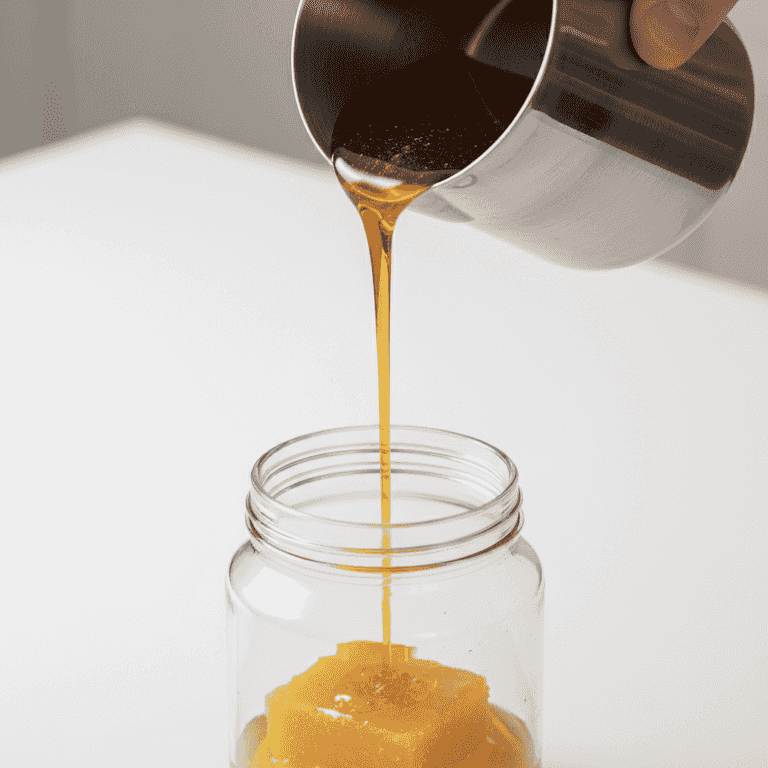
Pour the wax
5 minutesSlowly pour the melted beeswax into your prepared jars, leaving about half an inch of space at the top.
Pouring slowly helps reduce air bubbles and ensures a smooth finish. Keep the wick centered as you pour.
Wear heat-resistant gloves while pouring to protect against accidental spills.
Warm your glass jars in the oven at a low temperature before pouring to prevent the wax from shrinking away from the glass sides.
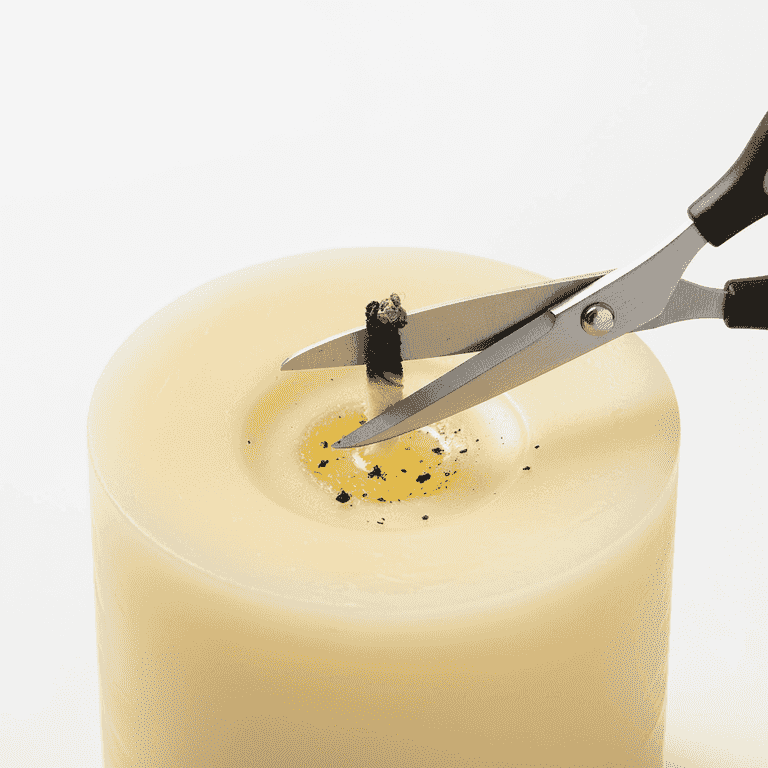
Cool and trim
25 minutesAllow the candle to cool completely at room temperature, then trim the wick to 1/4 inch.
Cooling slowly prevents cracking in the wax. Once solid, trim the wick to ensure a clean, smoke-free burn.
Let the candle cure for at least 24 hours before lighting for the best burn performance.
Pro Tips
- ●Use high-quality filtered beeswax to minimize debris in your candles.
- ●Add a small amount of coconut oil to the wax to improve the scent throw if using essential oils.
- ●Always burn your candle for at least two hours on the first light to create an even melt pool.
- ●Store your candles in a cool, dark place to maintain their color and texture.