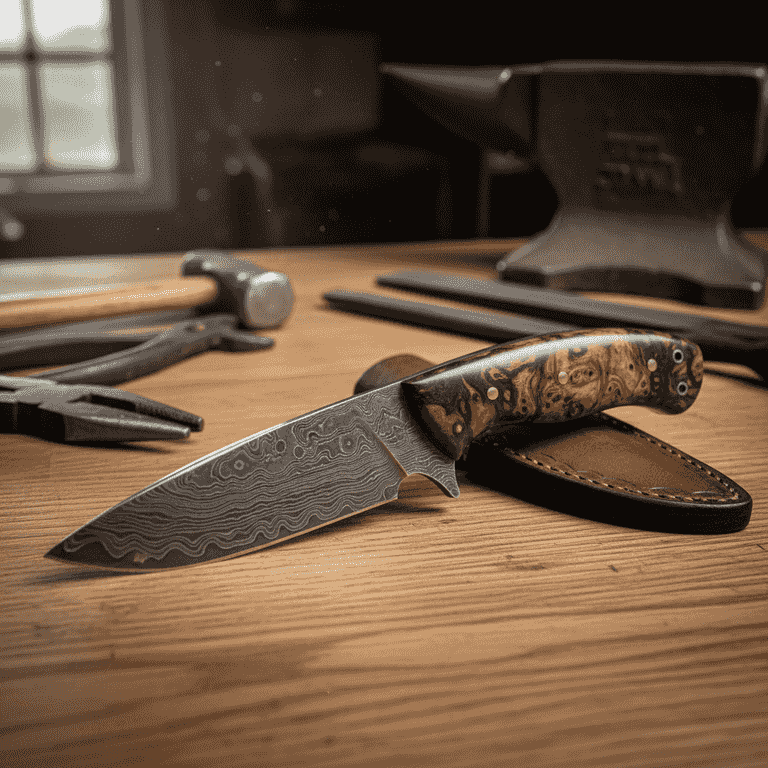
How to Make a Fixed-Blade Knife from Scratch
Craft a custom fixed-blade knife using the stock removal method. This guide covers the process from shaping raw steel to sharpening your finished edge.

Design and cut the profile
1 hourDraw your knife design onto a piece of high-carbon steel and cut it out using an angle grinder.
Trace your outline clearly with a marker. Use the grinder to remove excess steel, keeping the blade shape slightly oversized to allow for refinement.
Secure the steel firmly in a bench vise before cutting.
Keep the steel cool by dipping it in water frequently to prevent ruining the temper.
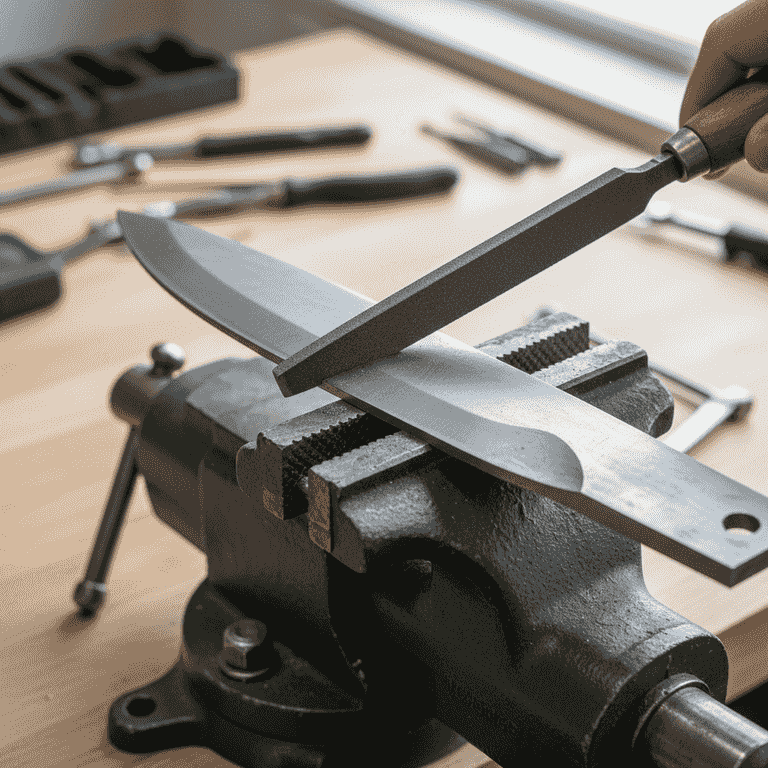
Grind the bevels
3 hoursCreate the cutting edge by grinding bevels from the spine toward the edge.
Use a belt grinder or files to remove metal evenly from both sides. Maintain a consistent angle to ensure the blade is symmetrical.
Do not grind the edge to a razor thinness yet; leave it about 1mm thick to prevent warping during heat treatment.
Draw a center line on the edge of the steel to act as a guide for your grinding.
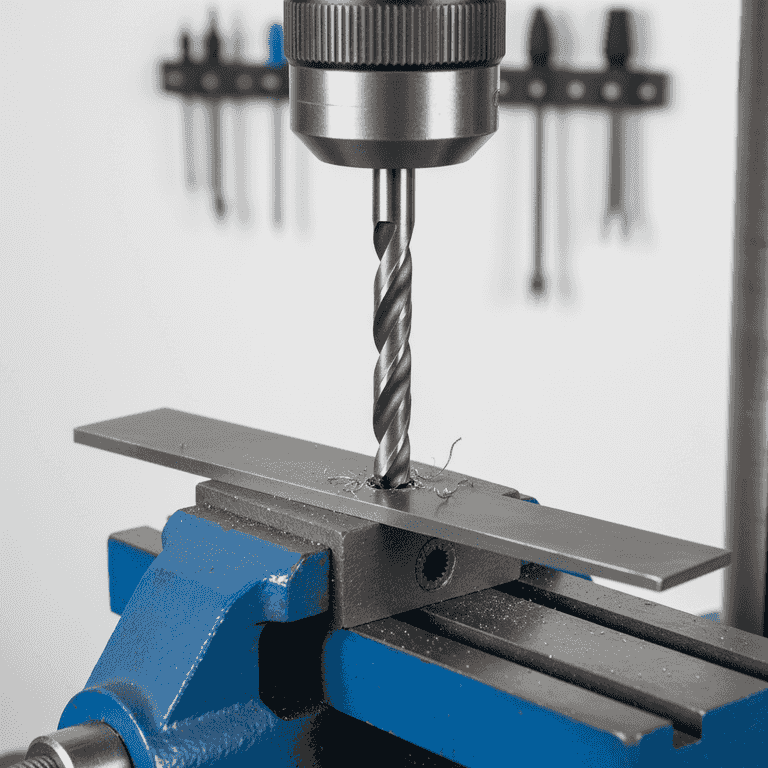
Drill handle holes
30 minutesDrill holes through the tang for the handle pins and lanyard tube.
Use a drill press with a cobalt or carbide bit designed for hardened steel. Ensure the holes are spaced correctly according to your handle design.
Ensure the blade is securely clamped to the drill press table.
Use a center punch to create a divot so the drill bit does not wander.
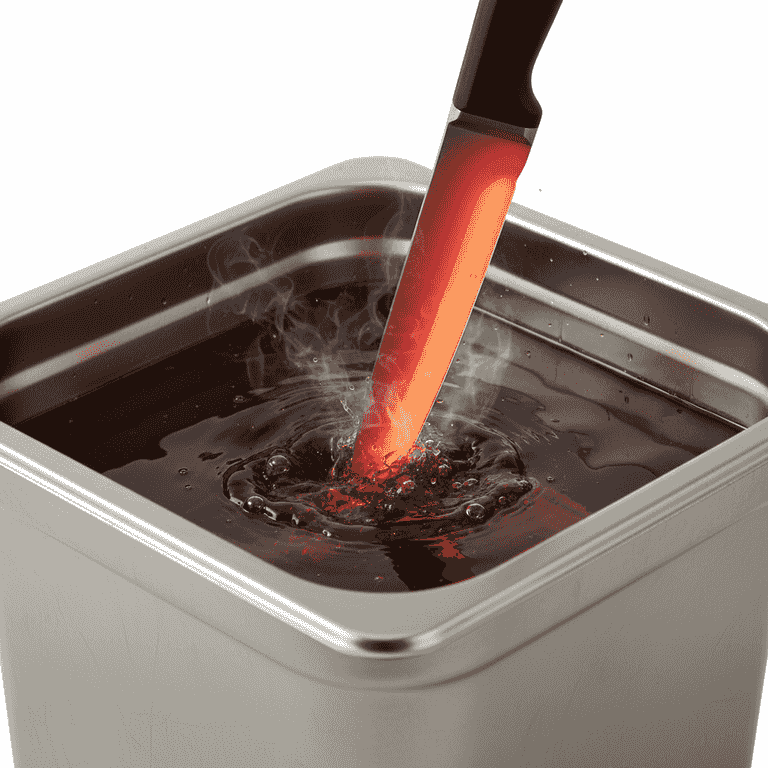
Heat treat the blade
1 hourHeat the blade to the critical temperature and quench it in oil.
Heat the blade evenly until it is non-magnetic, then plunge it vertically into the oil quench tank. This locks the steel's molecular structure for hardness.
Oil quench tanks can flare up; keep a fire extinguisher nearby.
Test the steel with a magnet to determine when it reaches the critical temperature.
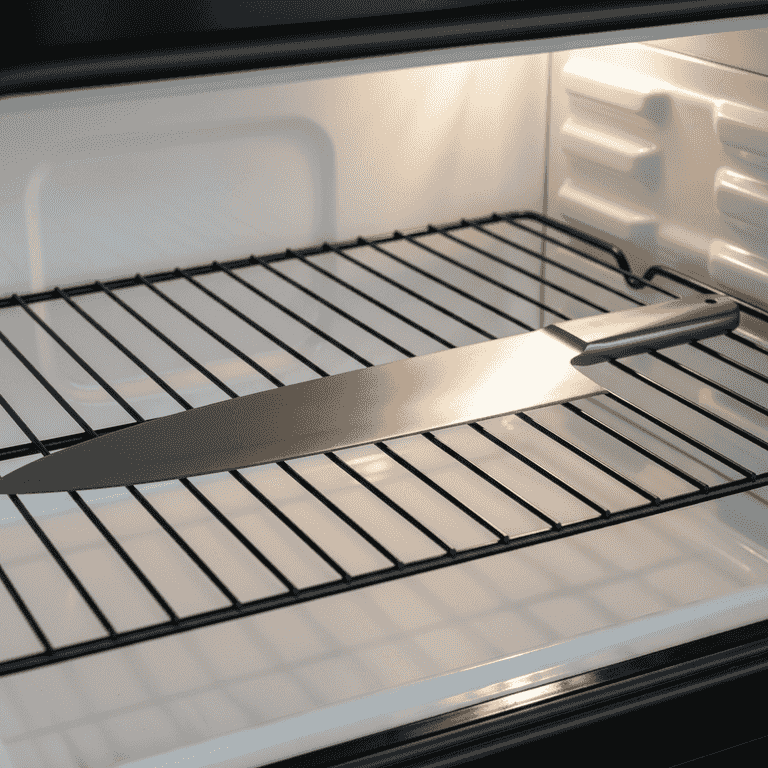
Temper the steel
2 hoursPlace the blade in a kitchen oven to relieve internal stress.
Bake the blade at approximately 400°F (200°C) for two hours. This makes the blade tough rather than brittle.
Do not touch the blade with bare hands immediately after removing from the oven.
Check the steel manufacturer's data sheet for specific tempering temperatures.
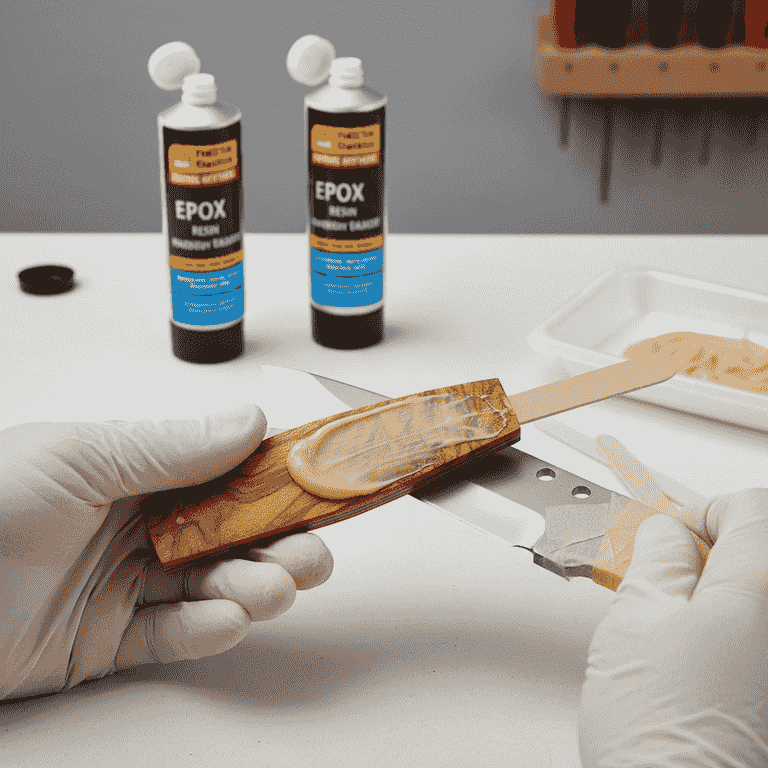
Attach handle scales
4 hoursGlue and pin your chosen handle material to the tang.
Apply epoxy to the scales and pins, then clamp them tightly together. Once dry, shape the handle to fit your grip using files and sandpaper.
Ensure the epoxy is fully cured before removing the clamps.
Use masking tape to protect the finished blade while shaping the handle.
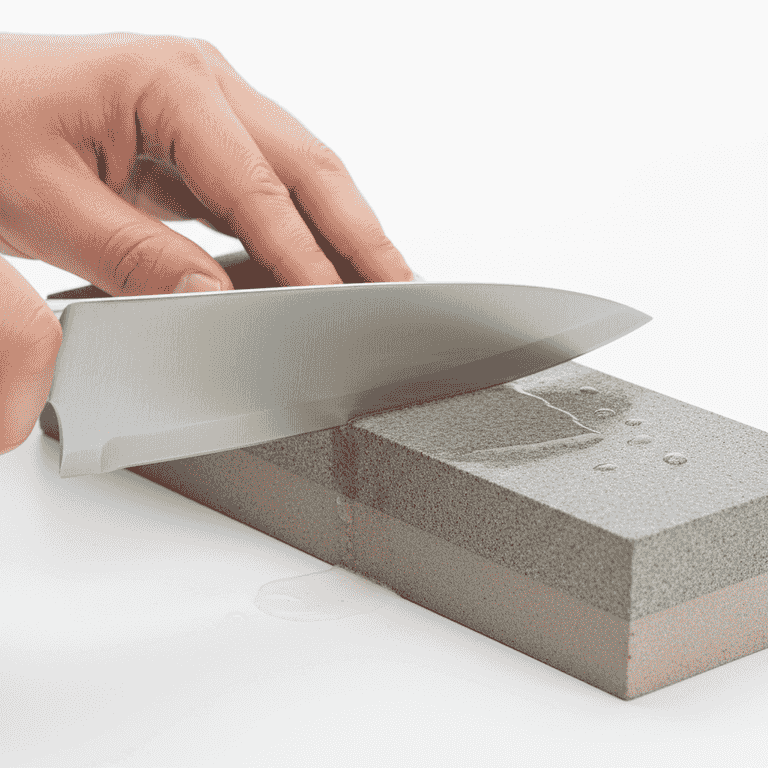
Sharpen the blade
1 hourFinalize the edge using sharpening stones or a honing system.
Progress from coarse to fine grit stones, maintaining a consistent angle. Remove the burr to achieve a razor-sharp finish.
The blade is now extremely sharp; handle with extreme care.
Test sharpness by slicing through a piece of paper.
Pro Tips
- ●Always use high-carbon steel like 1084 for your first knife; it is very forgiving to heat treat.
- ●Keep your workspace organized to avoid losing small parts like pins or epoxy mixers.
- ●Take your time with hand-sanding; it is the difference between a rough craft and a professional-looking tool.
- ●Record your heat treatment process in a notebook to replicate successful results in the future.