
How to Install RAM in a Laptop
Upgrade your laptop's performance by installing additional memory modules. This guide will walk you through the process of safely opening your device and securing new RAM sticks into the motherboard slots.

Power down and disconnect
2 minutesShut down the laptop completely and unplug the power adapter from the wall and the device.
Leaving the device plugged in poses a severe electrical shock risk and can cause short circuits. Ensure the device is fully powered off, not just in sleep or hibernate mode.
Never perform hardware upgrades while the battery is connected or the device is plugged in.
Check the power indicator light to ensure the device is completely off.
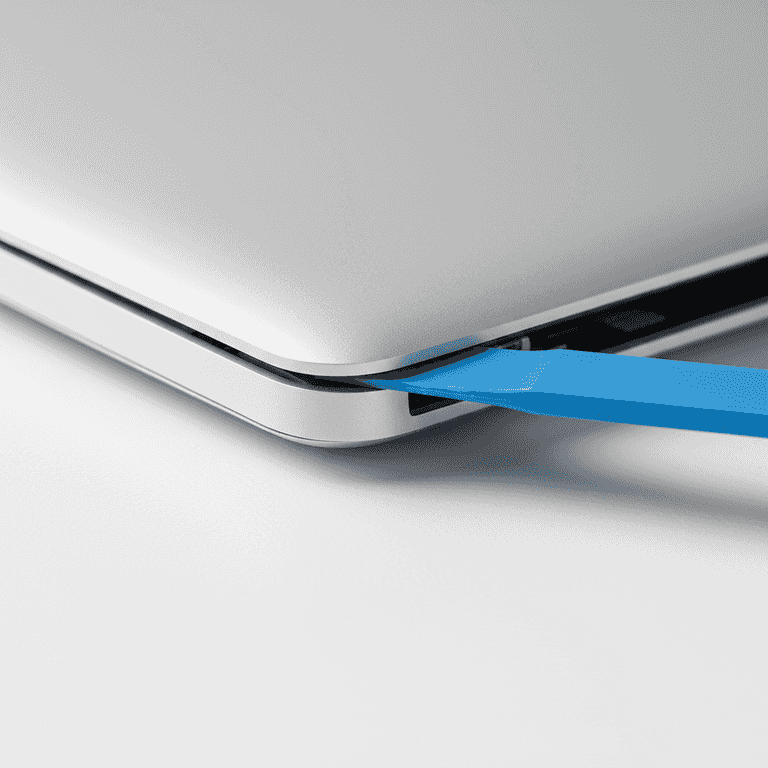
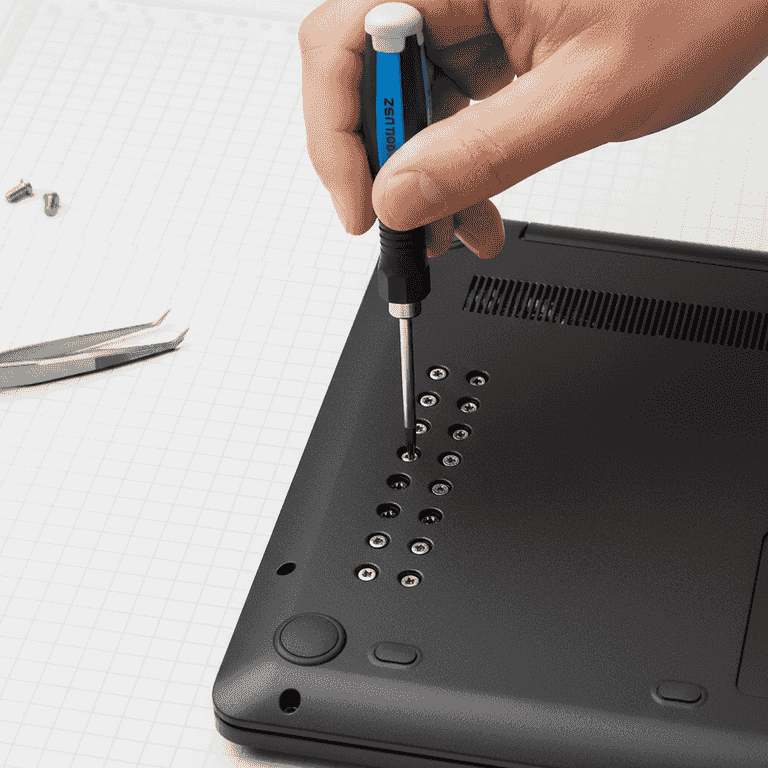
Open the bottom casing
10 minutesRemove the screws from the bottom panel and use a spudger to gently pry the cover off.
Use the precision screwdriver to remove all screws, keeping track of their locations as they may vary in length. Gently slide the plastic spudger along the seam to release the retention clips.
Do not force the panel; if it doesn't budge, check for hidden screws under rubber feet or stickers.
Place screws on a magnetic mat or in a small tray to prevent losing them.
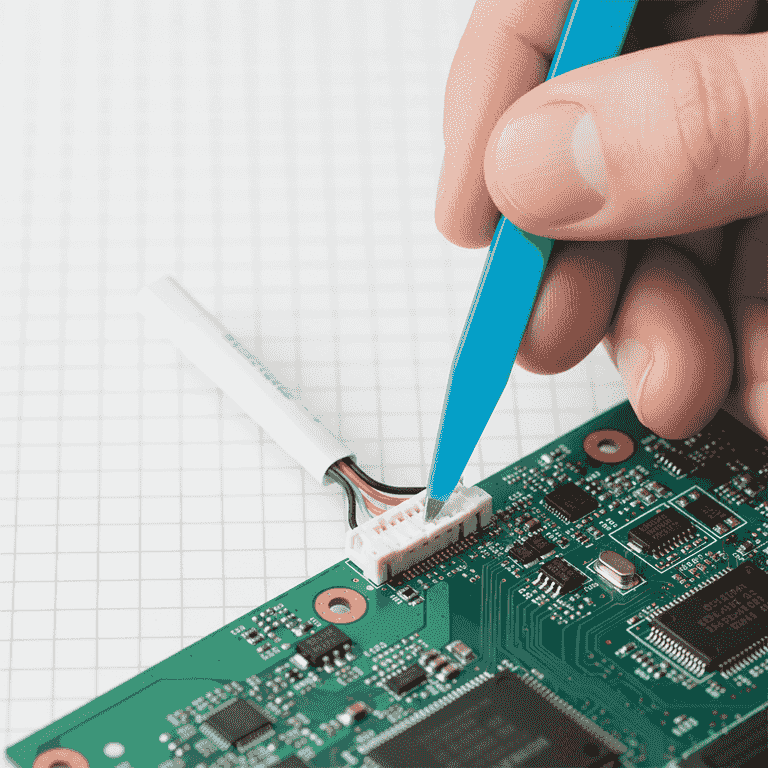
Disconnect the internal battery
3 minutesLocate the battery connector on the motherboard and carefully unplug it.
This is a crucial safety step to ensure there is no residual power flowing through the motherboard while you handle the RAM slots.
Avoid using metal tools near the battery connector to prevent shorting the pins.
Use your fingernails or the edge of the plastic spudger to pull the connector straight out.
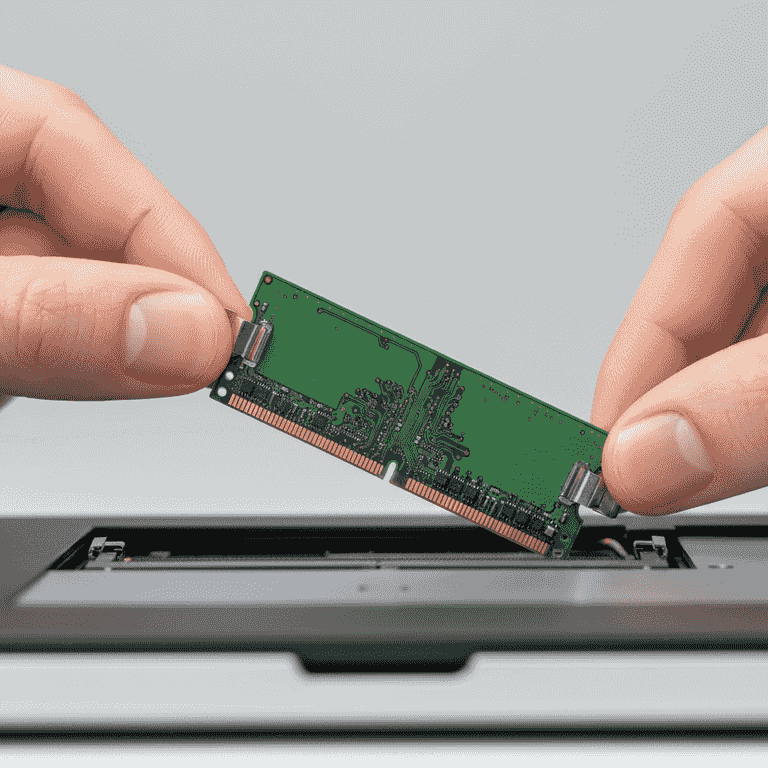
Locate and remove existing RAM
5 minutesIdentify the RAM slots and gently spread the metal clips on the sides to release the module.
The RAM stick will pop up at a 30-degree angle once the clips are released. Carefully pull the module out by its edges, avoiding contact with the gold pins.
Do not touch the gold contact fingers on the RAM stick as oils from your skin can cause connectivity issues.
If there is only one slot, you are replacing the module; if there are two, you may be adding to an empty slot.
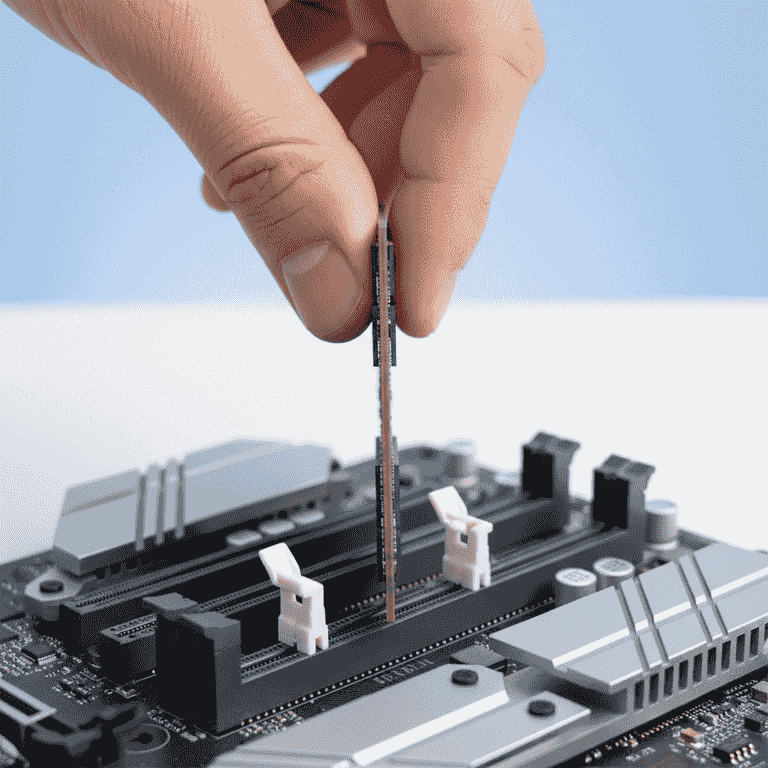
Install the new RAM
5 minutesAlign the notch on the new RAM module with the key in the slot and press it firmly into place.
Insert the module at the same 30-degree angle you removed the old one. Once fully seated, press down on the top edge until the side clips snap into the locked position.
Do not apply excessive force if the notch does not align, as this can damage the slot pins.
The notch is off-center, so the module will only fit in one orientation.
Reassemble and test
5 minutesReconnect the battery, replace the bottom cover, and power on the laptop to verify the upgrade.
Once the battery is plugged back in, snap the cover into place and replace all screws. Check the system information in your OS to confirm the new RAM capacity is detected.
If the laptop fails to boot or beeps, turn it off immediately and reseat the RAM.
Before closing the case, power on the laptop briefly to ensure it boots without errors.
Pro Tips
- ●Always check your laptop manufacturer's manual to confirm the maximum RAM capacity supported.
- ●Ensure the new RAM voltage and frequency match your system requirements to avoid compatibility issues.
- ●Use a magnetic tray to keep track of different screw sizes, as some laptop screws are specific to certain holes.
- ●If the system doesn't recognize the RAM, try cleaning the gold contacts with a clean, dry microfiber cloth.