
How to Install Low-Voltage Outdoor Lighting
Enhance your home's curb appeal and safety by installing a low-voltage landscape lighting system. This guide covers the process from planning your layout to connecting the transformer for a professional-looking result.
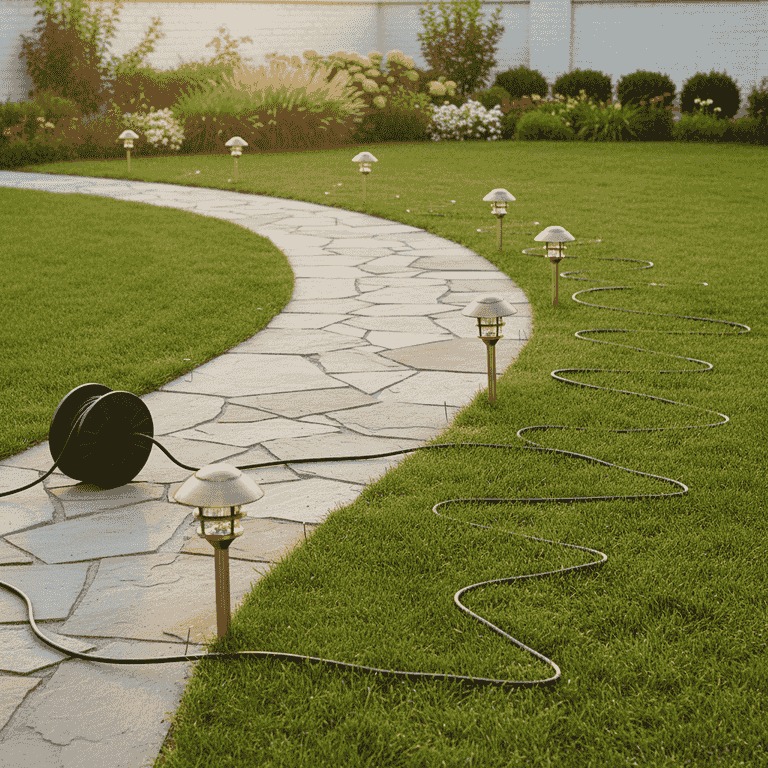
Plan your lighting layout
30 minutesPlace your lights along the path or garden beds to determine the best spacing and wire path.
Lay the lights out without burying them to visualize the effect at night. Ensure the path to the transformer location is clear of major obstacles.
Space your lights about 8 to 10 feet apart for an even, balanced glow.

Dig shallow trenches
60 minutesUse your shovel to create a 3-to-6-inch deep trench along the wire path.
A shallow trench keeps the wire protected from lawn mowers and foot traffic. You do not need deep excavation for low-voltage wire.
Call 811 before digging to avoid striking underground utility lines.
Use a flat-head shovel to make a clean slit in the sod, which is easier to repair later.

Install the light fixtures
45 minutesInsert the light stakes into the ground using a rubber mallet.
Ensure the stakes are driven in straight so the lights sit level. Connect the fixture leads to the main cable using the provided quick-connect clips.
Tap the mallet gently to avoid cracking plastic stakes.
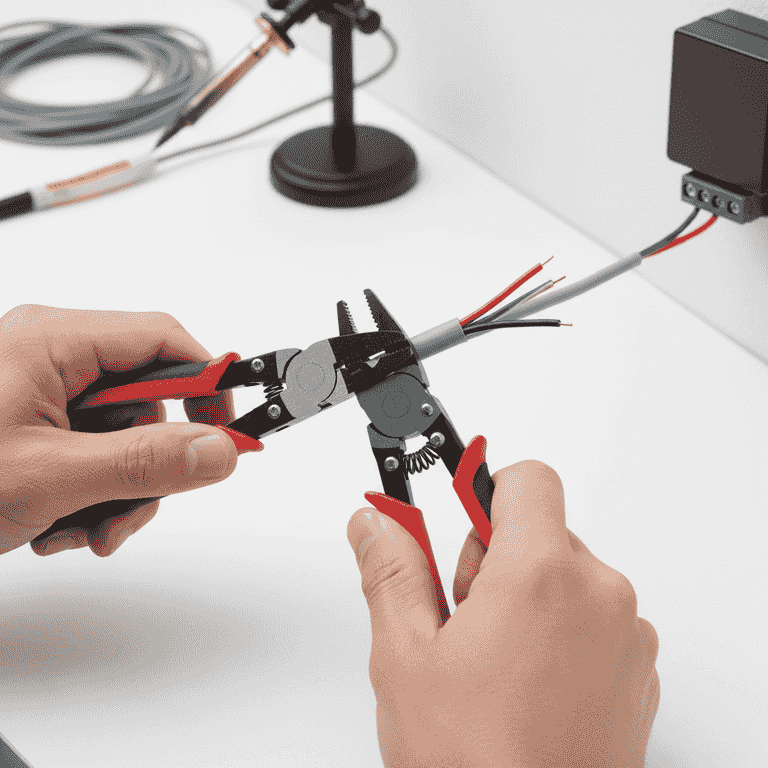
Connect the wire to the transformer
30 minutesStrip the ends of your main wire and secure them to the terminals on the transformer.
The transformer should be mounted on a wall near an outdoor GFCI outlet. Use wire strippers to expose 1/2 inch of wire before tightening the terminal screws.
Ensure the transformer is unplugged while making connections to the terminal block.
Ensure the transformer is rated for the total wattage of all your light bulbs combined.

Test the system
15 minutesPlug the transformer in and verify all lights illuminate properly.
Walk the path to ensure every light is working. If a light is out, check the connection at the main wire.
Use a voltage tester to ensure power is reaching the end of the wire run if lights are flickering.
Pro Tips
- ●Use LED bulbs to significantly reduce energy consumption and bulb replacement frequency.
- ●Always leave a little extra wire slack at each fixture for future adjustments.
- ●Consider adding a photocell or timer to the transformer so lights turn on and off automatically.
- ●Use burial-rated landscape wire to prevent corrosion from soil moisture.