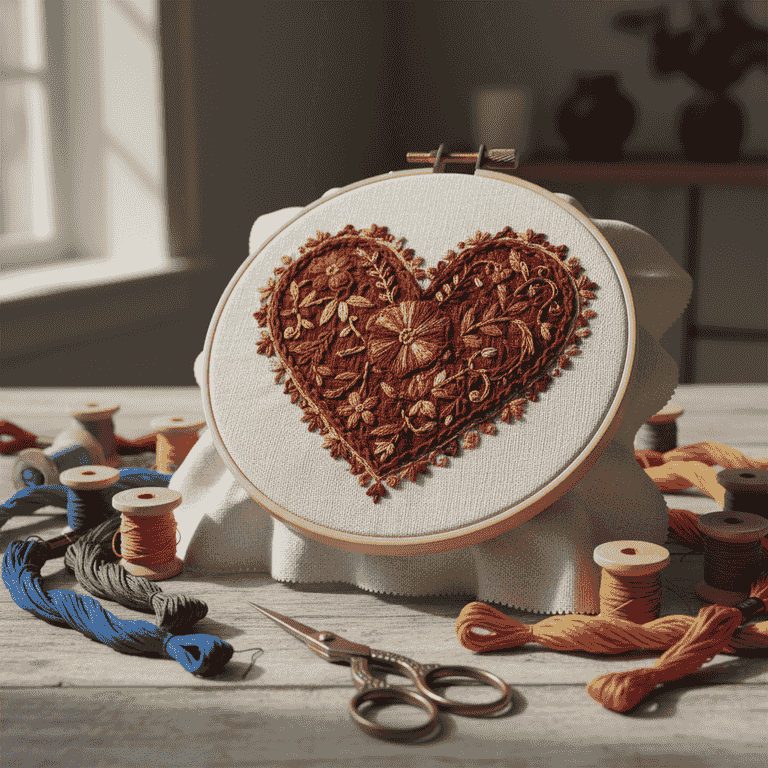
How to Embroider a Simple Design
Learn the fundamentals of hand embroidery by creating a simple design on fabric. This guide covers everything from preparing your hoop to finishing your stitches, making it perfect for beginners.
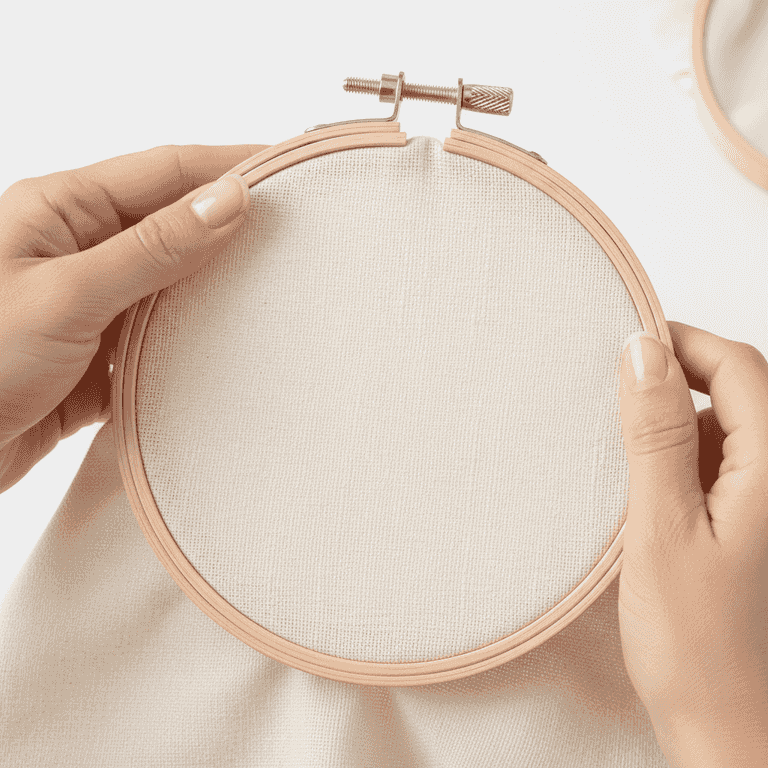
Secure the fabric
2 minutesPlace your fabric over the inner ring of the embroidery hoop and press the outer ring down over it.
Tighten the screw on the hoop to ensure the fabric is drum-tight. A loose fabric will cause your stitches to pucker and look uneven.
Ensure the grain of the fabric is straight before tightening the screw.
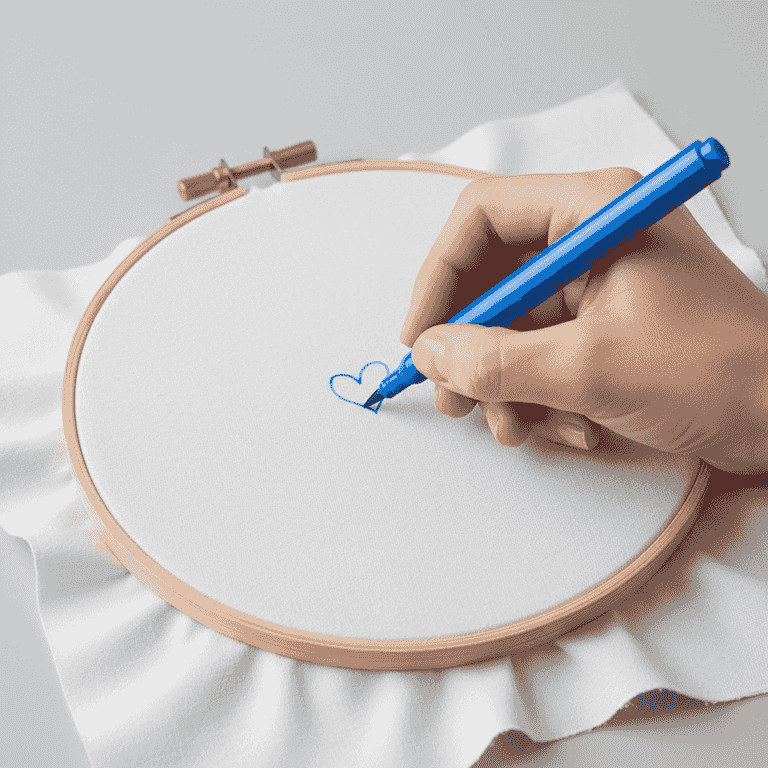
Transfer your design
5 minutesDraw a simple pattern, such as a heart or a flower, onto the center of the fabric using a fabric marker.
Keep the design simple so you can focus on mastering the stitch technique. Ensure your lines are clear enough to follow as you sew.
Use a light box or a sunny window to trace a printed pattern onto your fabric.
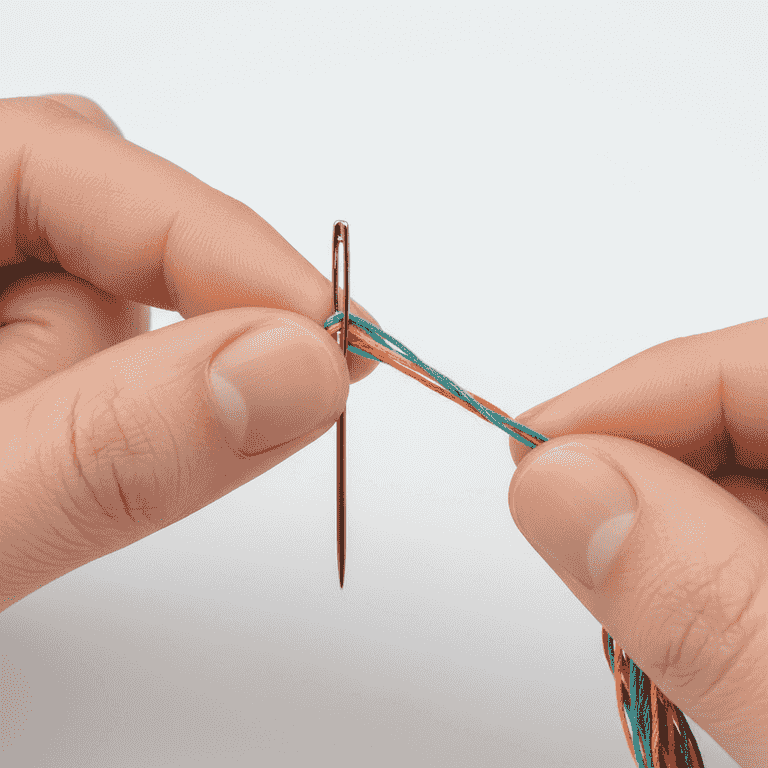
Thread the needle
3 minutesCut a length of embroidery floss, separate two strands, and thread them through the eye of the needle.
Embroidery floss usually comes in six strands; using two or three is standard for fine detail. Tie a small knot at the end of the thread to secure it.
Be careful of the sharp needle tip when pulling the thread through.
If the thread is hard to see, hold it against a white piece of paper to help thread the needle.

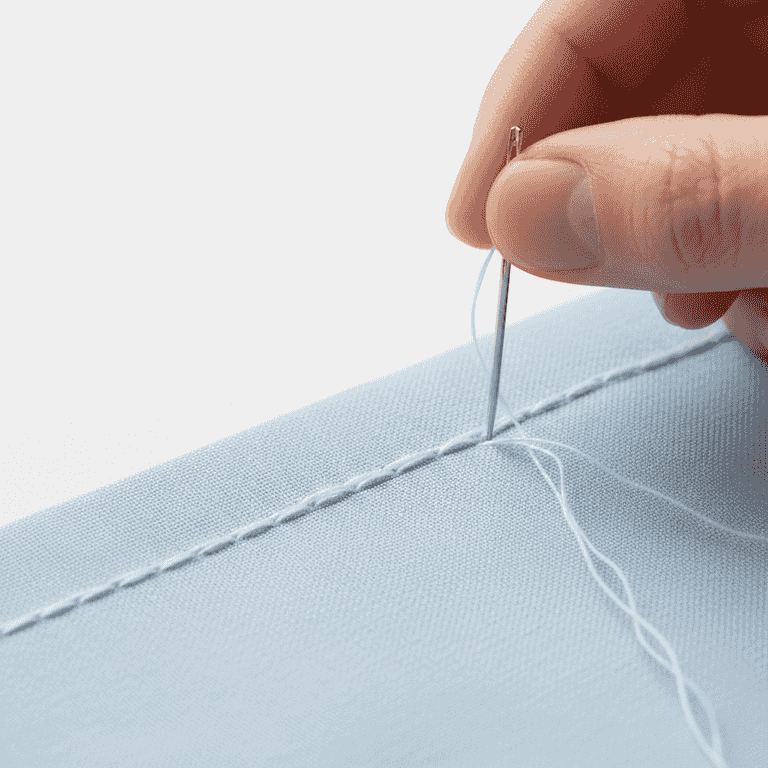
Start your first stitch
2 minutesBring the needle up from the back of the fabric through the starting point of your drawn line.
Pull the thread until the knot catches on the back of the fabric. This anchors your thread firmly before you begin stitching.
Always start from the back to keep the knot hidden on the underside.
Execute the backstitch
20 minutesCreate stitches by inserting the needle a short distance ahead and coming back up one stitch length behind it.
This method creates a continuous, solid line. Repeat this process, always bringing the needle up at the end of the previous stitch.
Keep your stitch length consistent for a professional, uniform look.
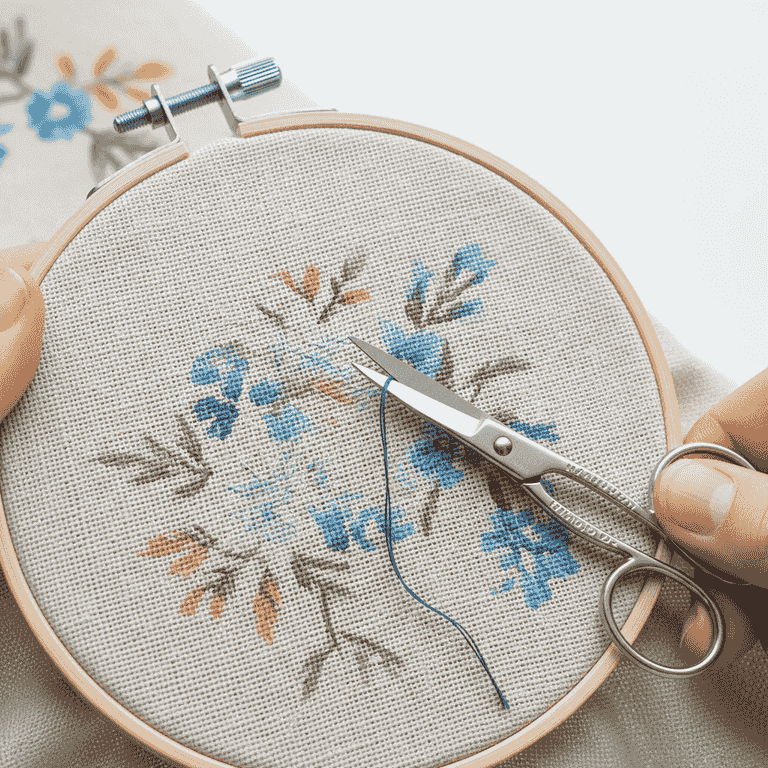
Finish and secure
3 minutesWhen finished, tie off the thread on the back of the fabric by weaving it through existing stitches and trimming the excess.
Avoid leaving long, loose threads on the back, as these can show through the front or get tangled. Cut the thread close to the knot using your embroidery scissors.
Ensure you do not cut the fabric while trimming your thread.
A tiny dab of clear fabric glue on the final knot can add extra security.
Pro Tips
- ●Always use a fresh needle, as dull needles can damage fabric fibers.
- ●Practice different stitch types on scrap fabric before starting your main project.
- ●Keep your tension consistent; pulling too hard will pucker the fabric.
- ●Store your embroidery floss in bobbins to prevent tangling.