How to Change Your Vehicle's Cabin Air Filter
Improve your vehicle's interior air quality and HVAC efficiency by replacing a dirty cabin air filter. This simple maintenance task is typically performed every 12,000 to 15,000 miles and requires no specialized mechanical knowledge.
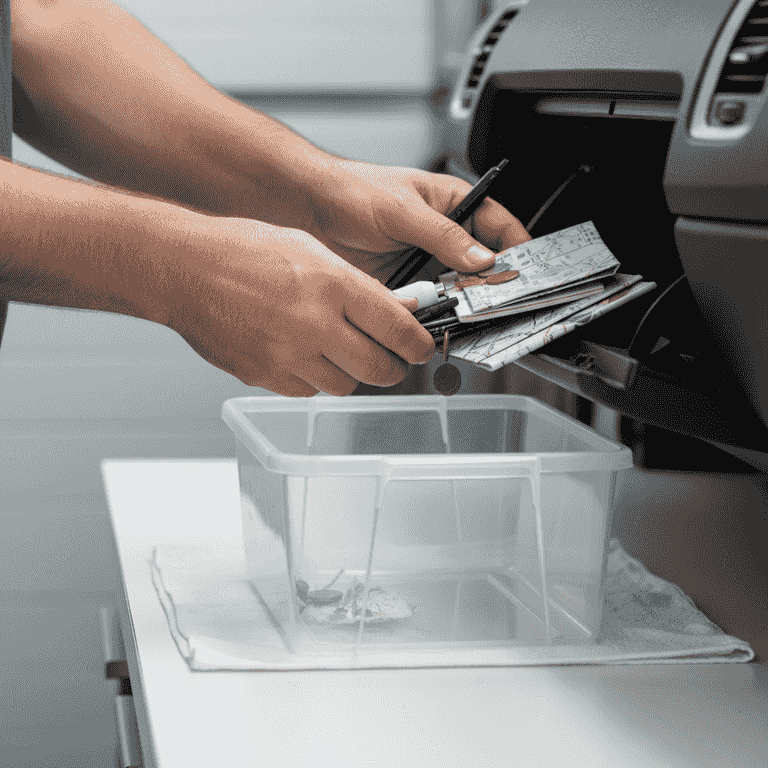
Clear the glove box
2 minutesEmpty all contents from the glove box to prevent items from falling out during the process.
Removing the items provides better access to the back of the compartment and ensures you don't lose any personal belongings while working.
Keep the items in a small box or bag nearby to keep them organized.
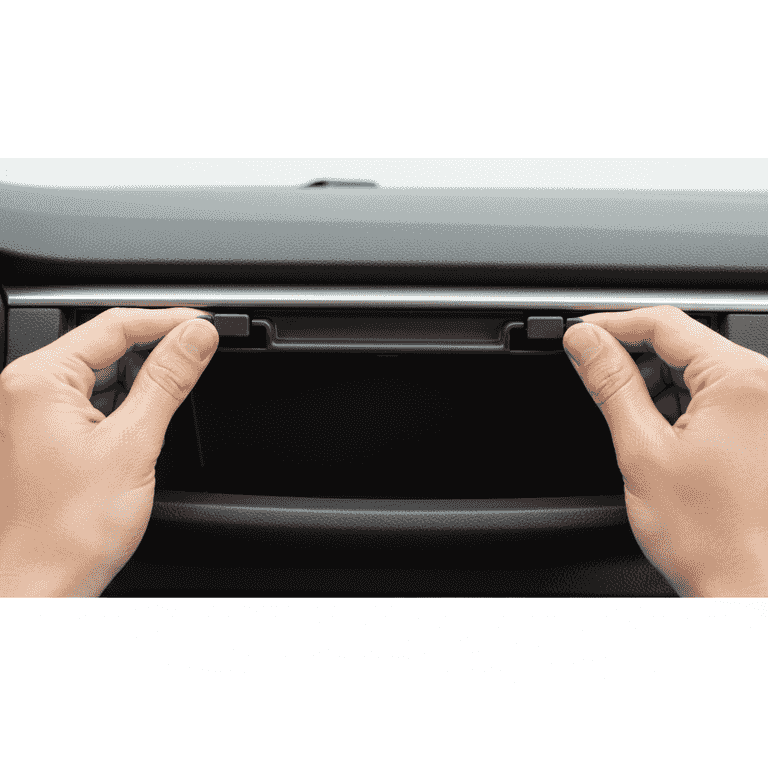
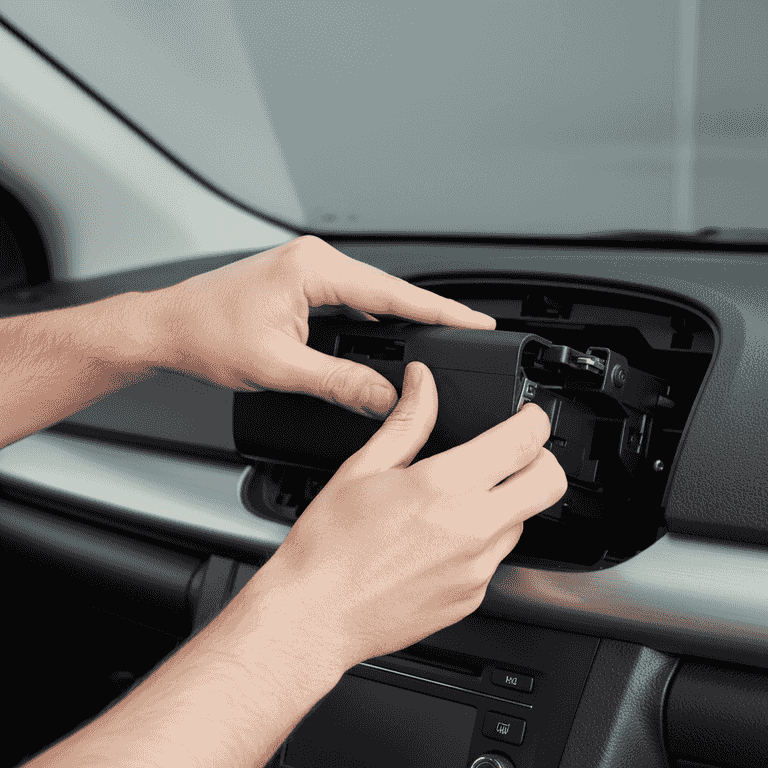
Remove the glove box assembly
3 minutesRelease the glove box hinge or remove the retaining screws to lower the compartment.
Most vehicles feature a simple latch or 'stop' tab that can be pushed or pulled to allow the glove box to drop fully down. Consult your owner's manual if you encounter resistance.
Do not force the plastic tabs, as they can snap easily.
Apply gentle pressure to the sides of the glove box to disengage the retaining tabs.
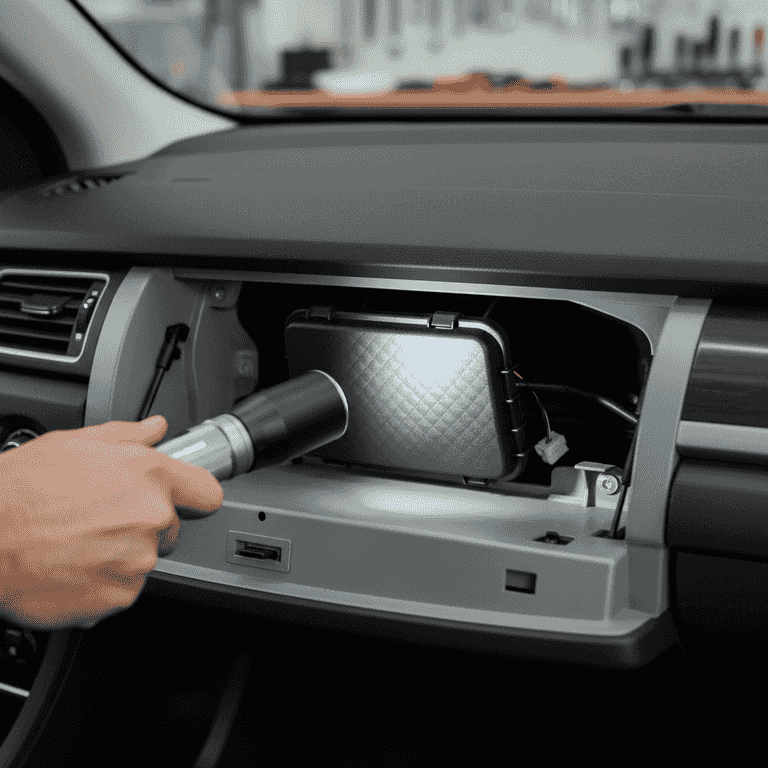
Locate the filter housing
2 minutesIdentify the rectangular plastic cover that houses the cabin air filter.
The filter housing is usually located directly behind or above the glove box opening. Use your flashlight to inspect the area for a small clip or latch that secures the cover.
Look for a rectangular door with a small tab on the side or top.
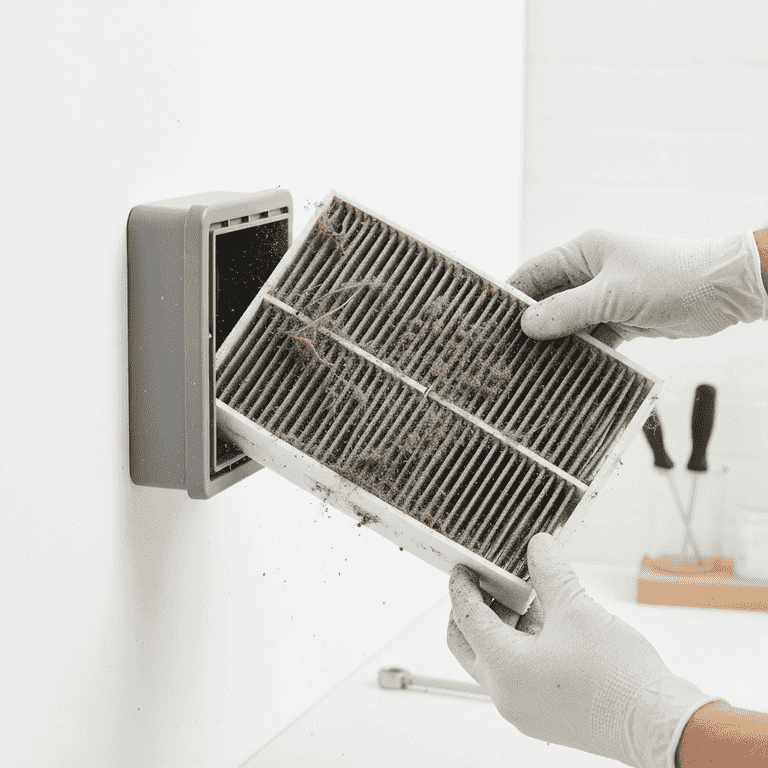
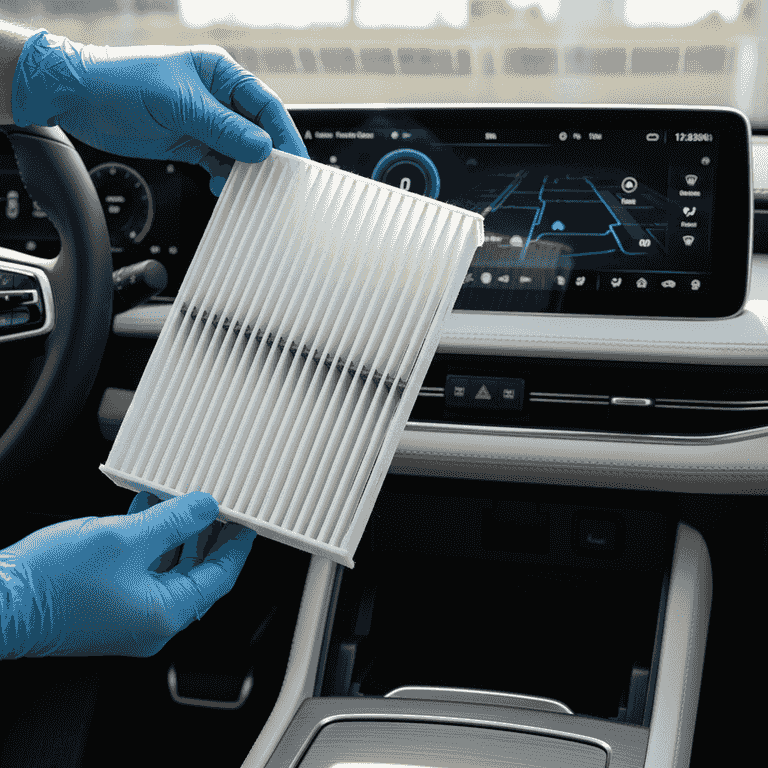
Remove the old filter
2 minutesOpen the housing cover and slide the old filter out of the slot.
Note the orientation of the old filter before removing it, as the new one must be installed in the same direction. Observe the airflow arrow marked on the side of the filter frame.
Be careful not to dislodge any leaves or debris that may have accumulated on top of the filter.
Have a trash bag ready to immediately place the dirty filter inside to prevent dust from spreading in the car.
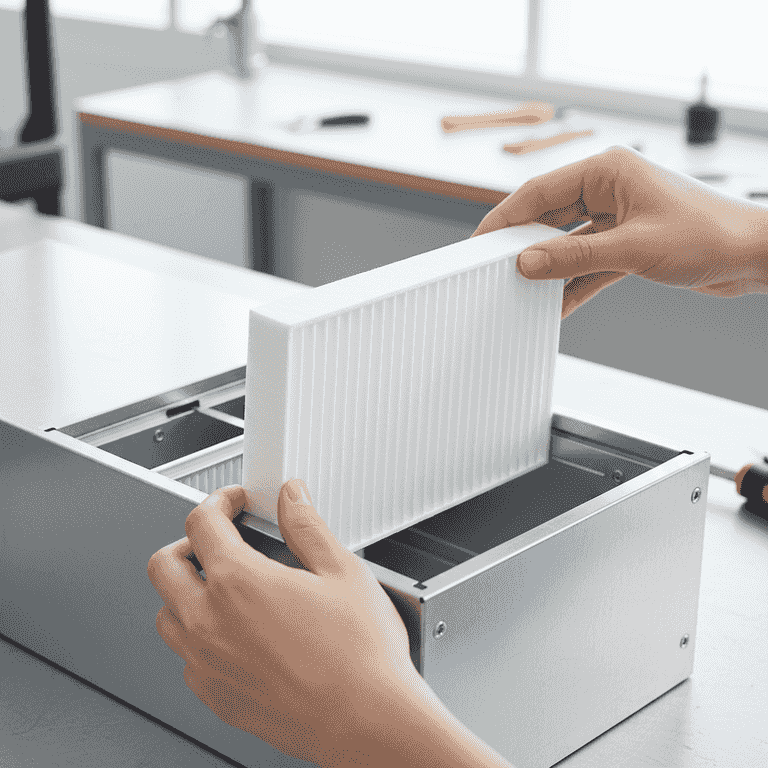
Install the new filter
2 minutesInsert the new filter into the housing, ensuring the airflow direction arrow matches the original.
Slide the new filter in gently until it sits flush within the slot. Ensure the edges are properly seated to prevent air bypass.
Ensure the filter is not bent or crushed during insertion.
Verify the 'Airflow' arrow on the filter points in the direction of the blower motor, usually downward.
Reassemble the compartment
4 minutesSnap the housing cover back into place and reinstall the glove box assembly.
Ensure the housing cover 'clicks' shut. Lift the glove box back into its original position and reconnect any hinge dampers or retaining screws removed earlier.
Check that the glove box opens and closes smoothly before putting your items back inside.
Pro Tips
- ●Check your cabin air filter during every oil change to see if it needs an early replacement.
- ●If you live in a dusty or high-pollen area, consider replacing the filter more frequently than the manufacturer's recommendation.
- ●Use a vacuum with a hose attachment to clean out the filter housing before inserting the new filter.
- ●Always buy a high-quality HEPA or activated carbon filter to help neutralize odors and filter finer particles.