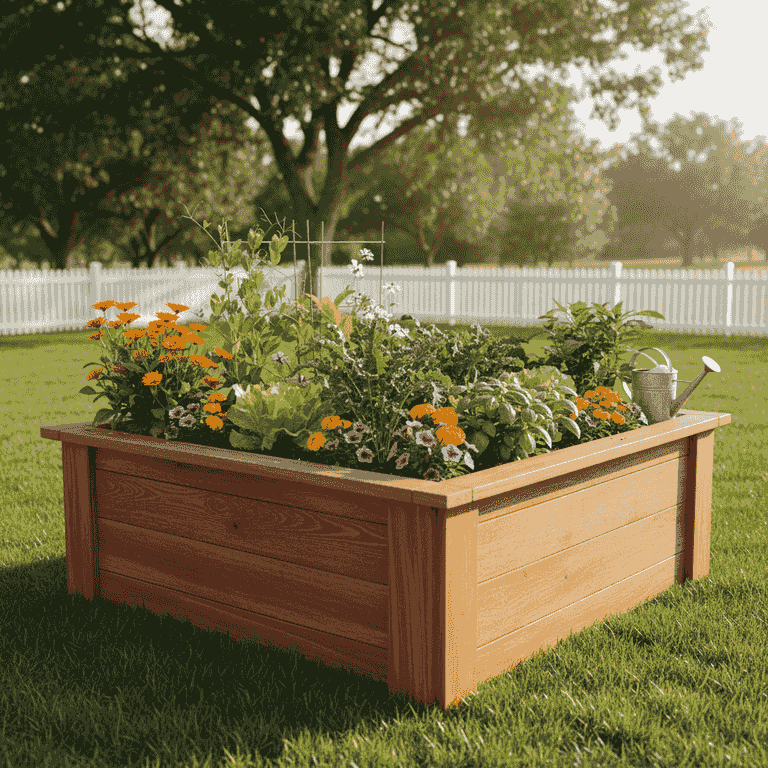
How to Build a Raised Garden Bed
Create a thriving vegetable or flower garden with a custom-built raised bed. This project helps improve soil drainage and control weed growth while providing a comfortable height for gardening.
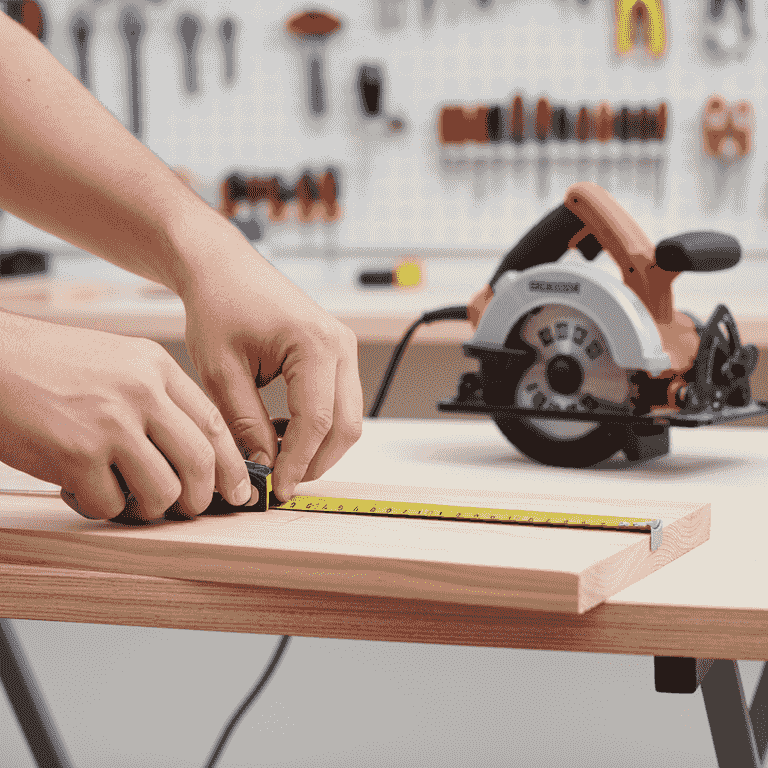
Measure and cut your lumber
30 minutesMeasure your desired dimensions and cut the lumber boards to length using a circular saw.
Standard raised beds are typically 4x8 feet. Ensure you have two long boards and two shorter end boards for each tier of the frame.
Always wear safety goggles and keep fingers clear of the blade path.
Ask your local lumber yard to cut the wood to size for you if you do not own a saw.
Clear and level the site
45 minutesClear the grass or debris from your chosen site and level the soil surface.
A level site prevents the garden bed from twisting and ensures even water distribution. Use a shovel to scrape away turf and a rake to smooth the dirt.
Lay down a piece of cardboard or landscape fabric to suppress weeds before placing the frame.
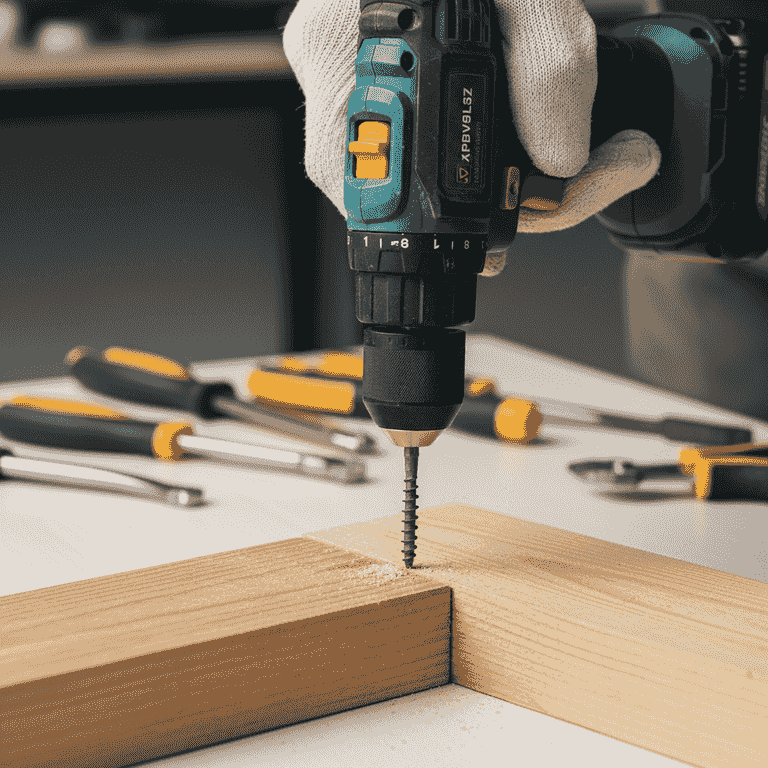
Assemble the frame corners
45 minutesAlign the boards at the corners and drive exterior-grade screws through the end boards into the long boards.
Use three or four screws per corner to ensure structural integrity. Pre-drill pilot holes to prevent the wood from splitting.
Ensure the screws are long enough to penetrate the adjacent board at least 2 inches.
Use a corner clamp to hold the boards at a perfect 90-degree angle while driving the screws.

Check for level and square
15 minutesPlace the assembled frame on the site and use a level to ensure it is flat.
Measure diagonally from corner to corner; if the measurements are equal, the frame is square. Adjust the soil underneath the frame if it is not level.
Check the level on all four sides of the frame.
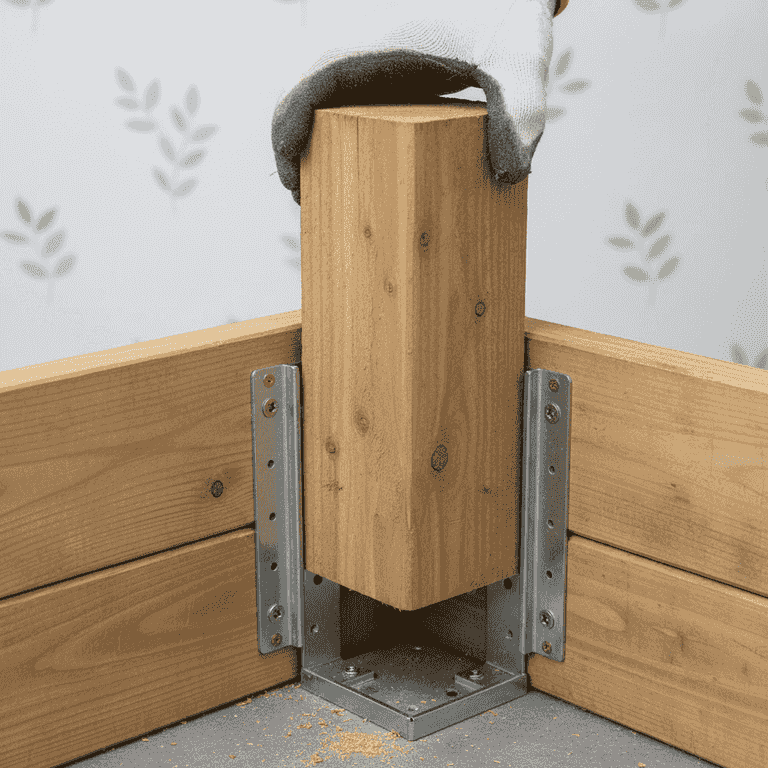
Install corner posts for stability
30 minutesAttach 4x4 wooden stakes inside the corners of the frame.
Driving these stakes into the ground helps anchor the bed and provides a solid base for stacking additional layers if you want a taller garden bed.
Check for underground utility lines before driving stakes deep into the ground.
Use a rubber mallet to drive the stakes into the ground without damaging the wood.
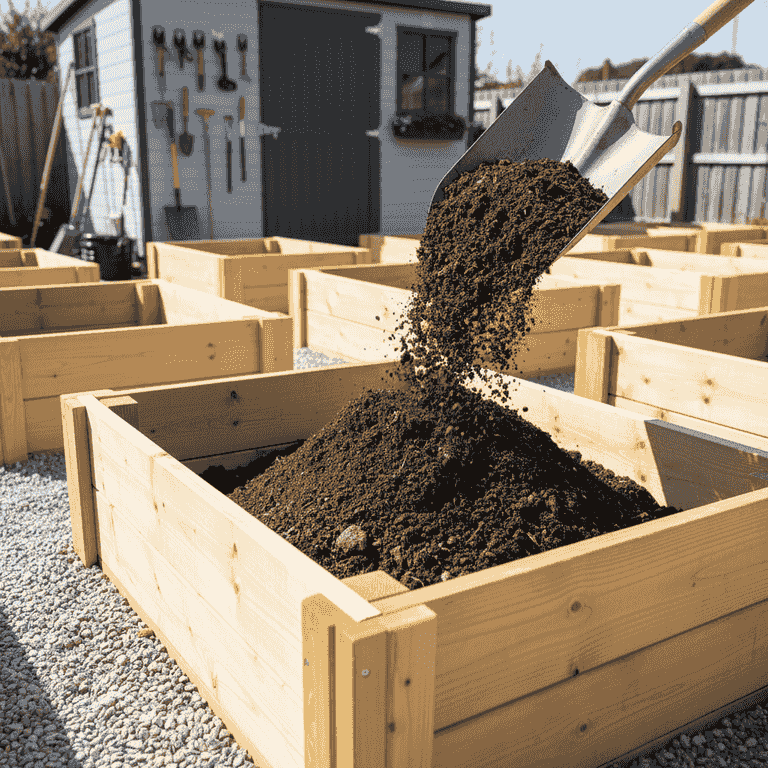
Fill the bed with soil
45 minutesFill the frame with a high-quality mix of topsoil, compost, and organic matter.
A mixture of 60% topsoil and 40% compost provides excellent nutrients for plants. Fill to within an inch of the top of the frame.
Water the soil lightly as you fill it to help settle the mixture.
Pro Tips
- ●Choose rot-resistant woods like cedar or redwood for a longer-lasting garden bed.
- ●Avoid using old railroad ties as they may contain creosote, which is toxic to plants.
- ●Ensure your garden bed is no wider than 4 feet so you can reach the center from either side without stepping inside.
- ●Add a layer of hardware cloth at the bottom if you have issues with gophers or burrowing rodents.